
TeslaMate Setup
Register Domain
The first thing we’ll need is a domain that will point to our TeslaMate server. I recently migrated all of my domains from Godaddy to Namesilo and can’t recommend them enough. Feel free to sign up with any domain registrar you’d like but if you wanted to check out Namesilo, make sure to use coupon code teslamate to save on your new domain.
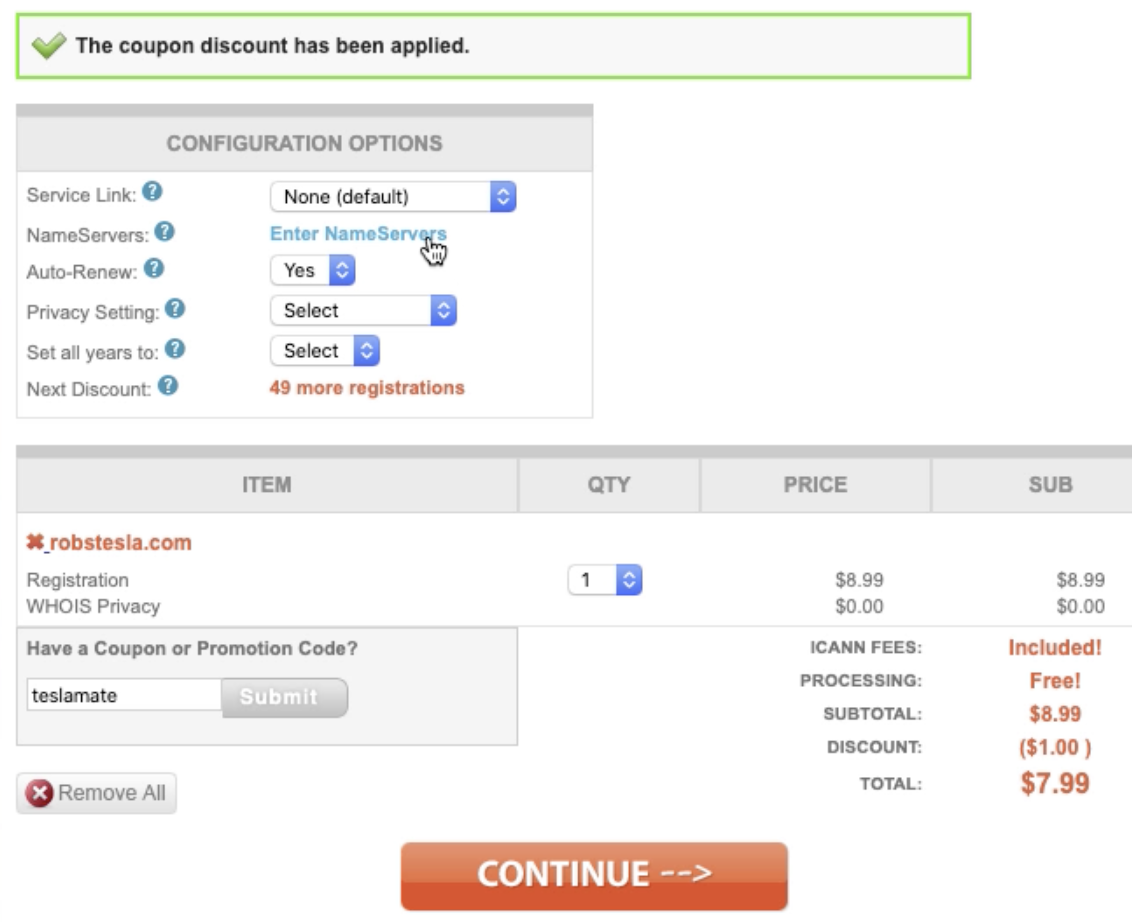
I’m purchasing robstesla.com to use for my server! The next step is to update the NameServers
Next, we need to tell our domain registrar, in this example, Namesilo, to point to the following NameServers: ns1.vultr.com and ns2.vultr.com
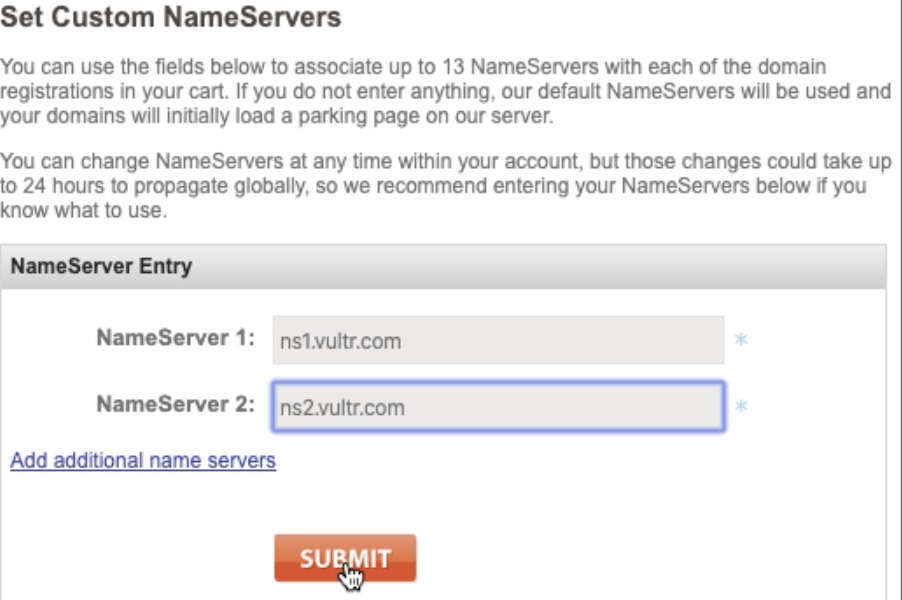
Domain secured! The next step is to set up the server.
Once you’re signed up, you’ll land at the Products page. The next step is to Deploy New Server
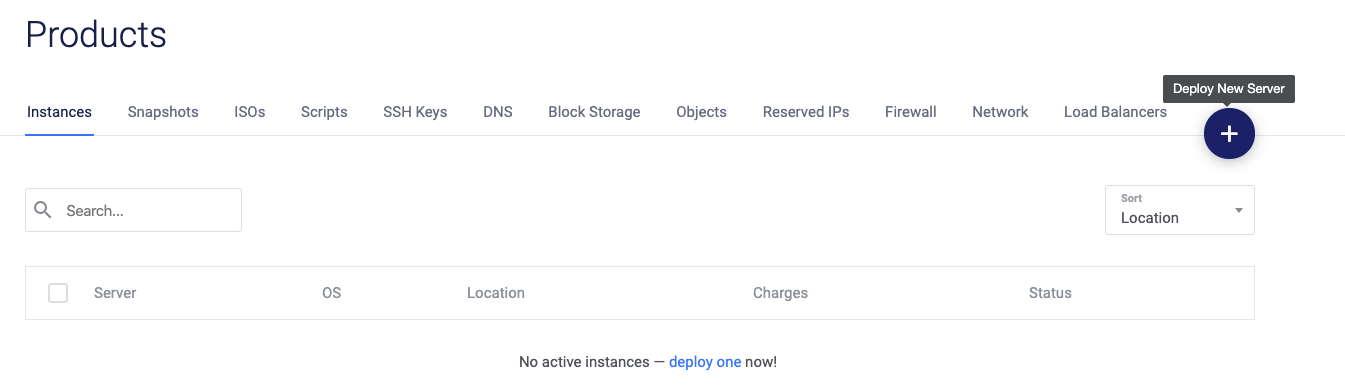
Click Deploy New Server
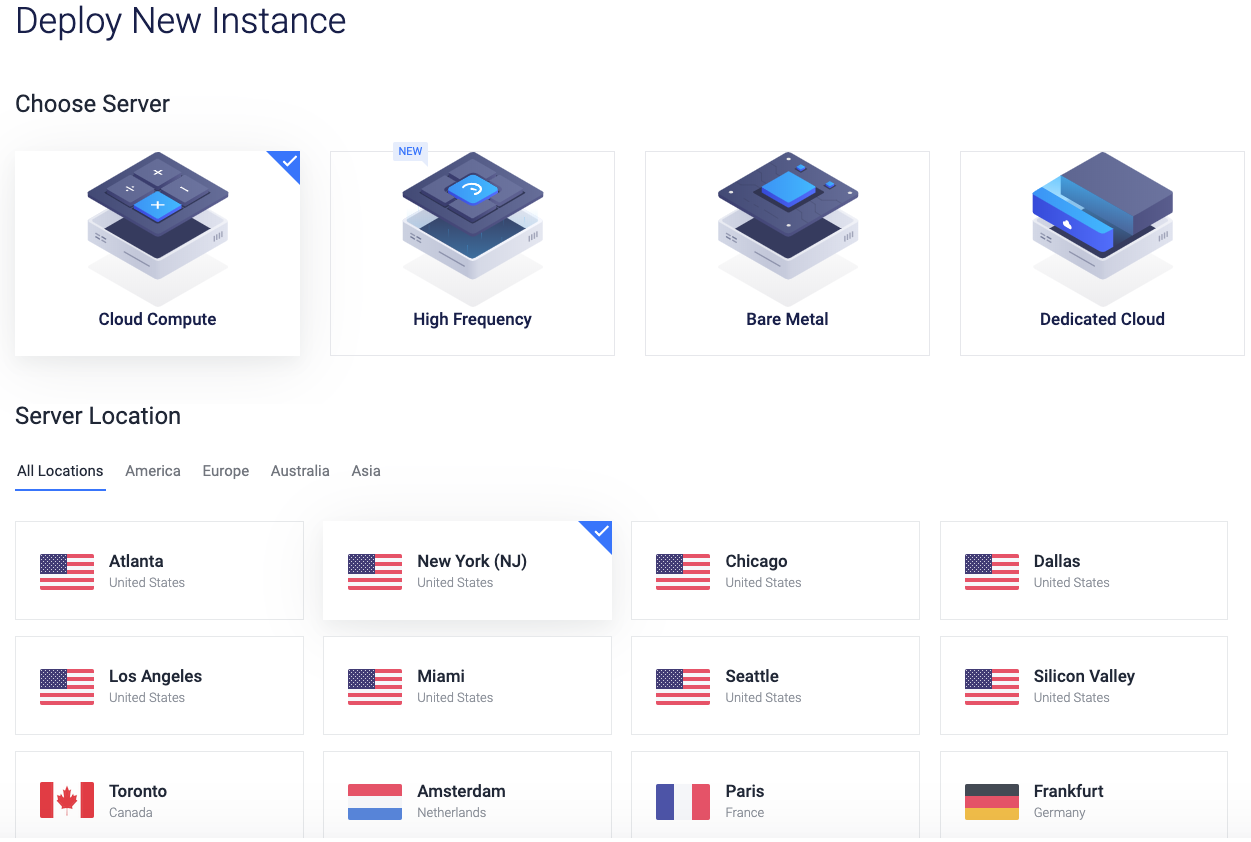
Make sure Cloud Compute is selected and choose the Server Location that you’re physically closet to
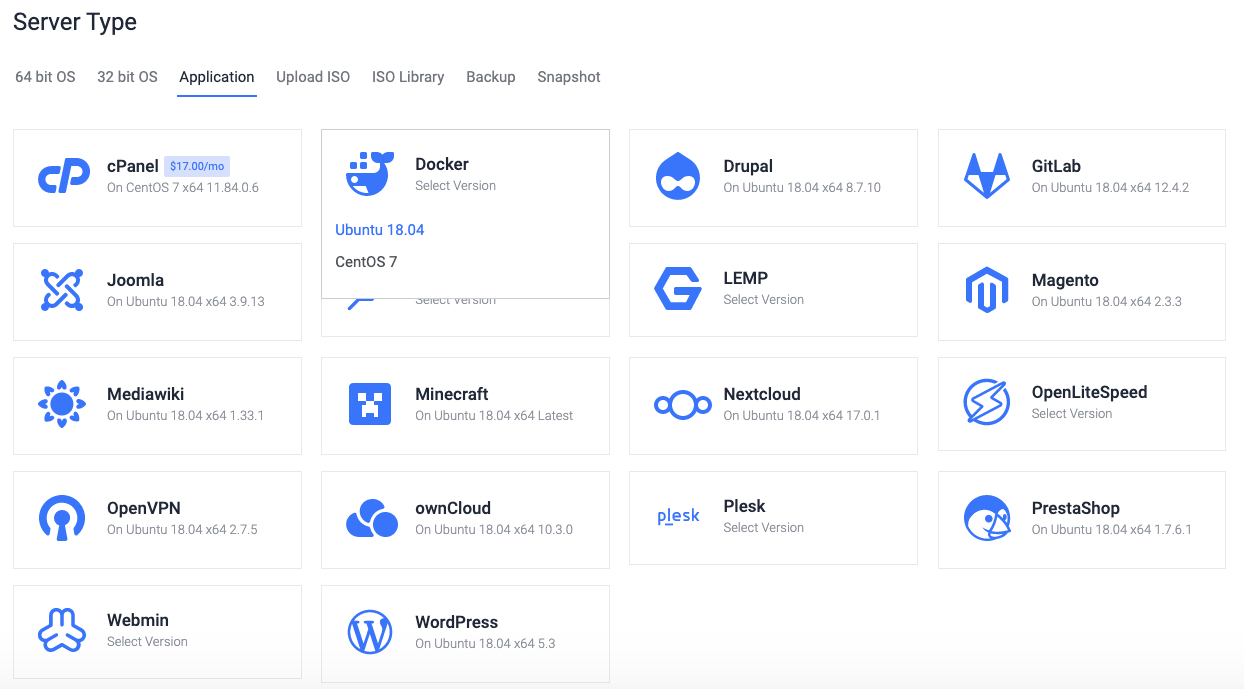
For Server Type, select the Application menu item and choose Docker with Ubuntu
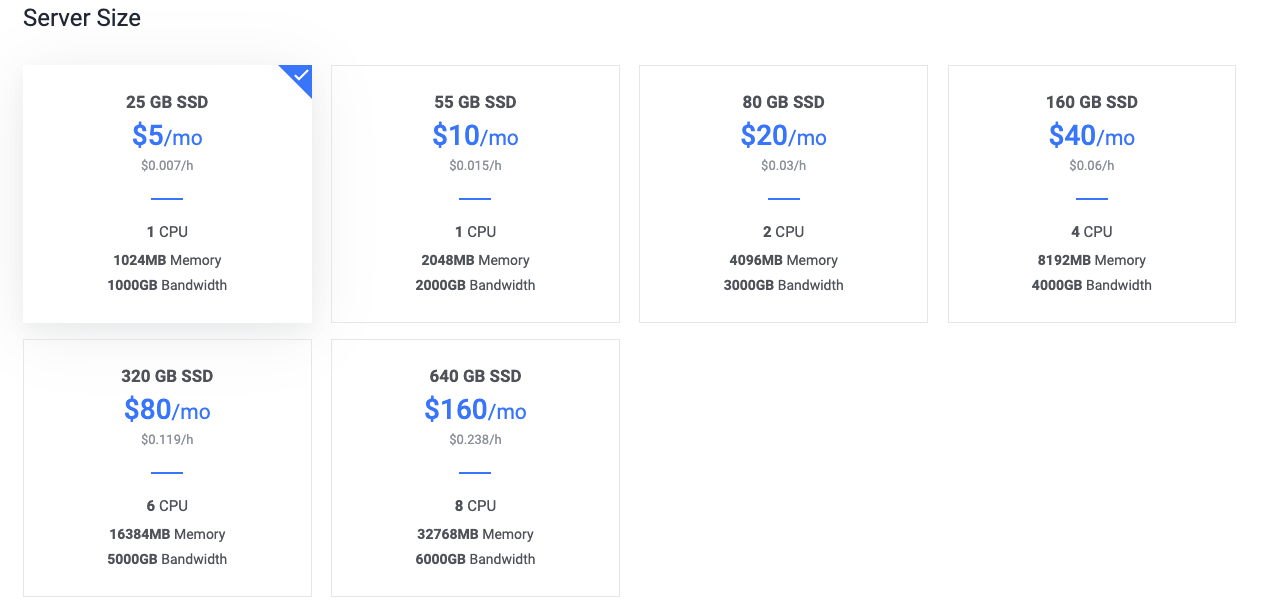
The $5/mo server should be good enough but feel free to add more horsepower and select a larger server
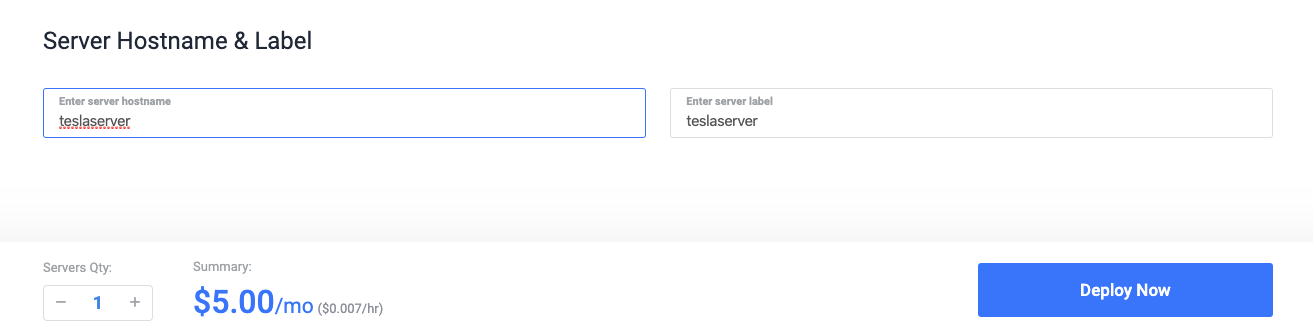
Give your Server a hostname (can be anything) and press Deploy Now
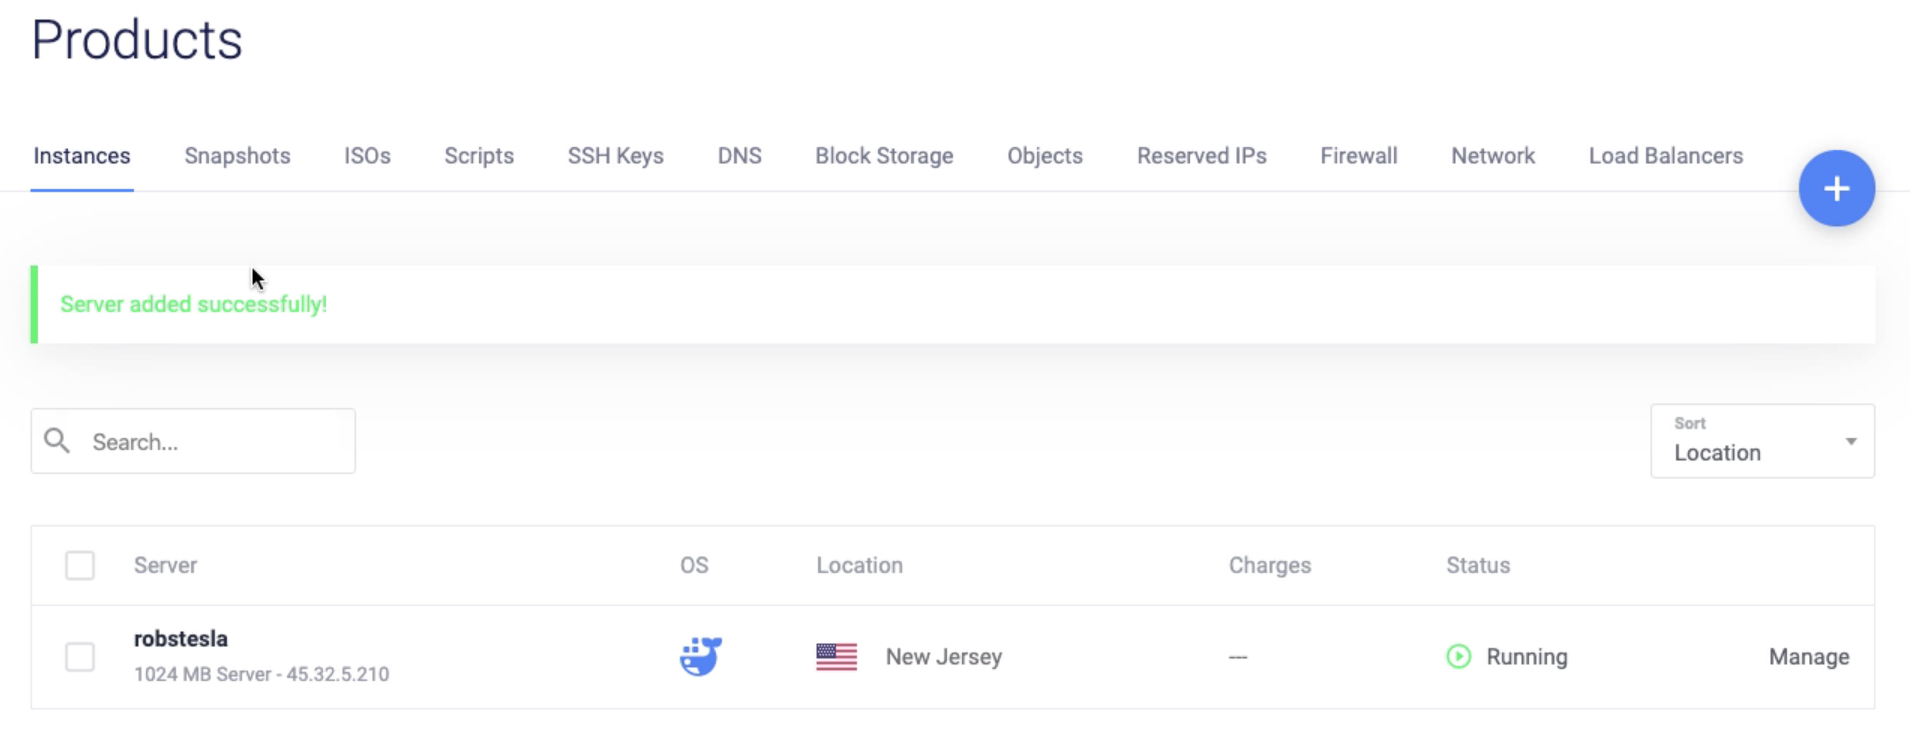
Now we wait. It shouldn’t take more than 5 minutes for your server to come online

Click into your Server and press the Eye icon to reveal your root password. We’ll need to copy this password so we may SSH into our server
Open the Terminal application on your Mac.

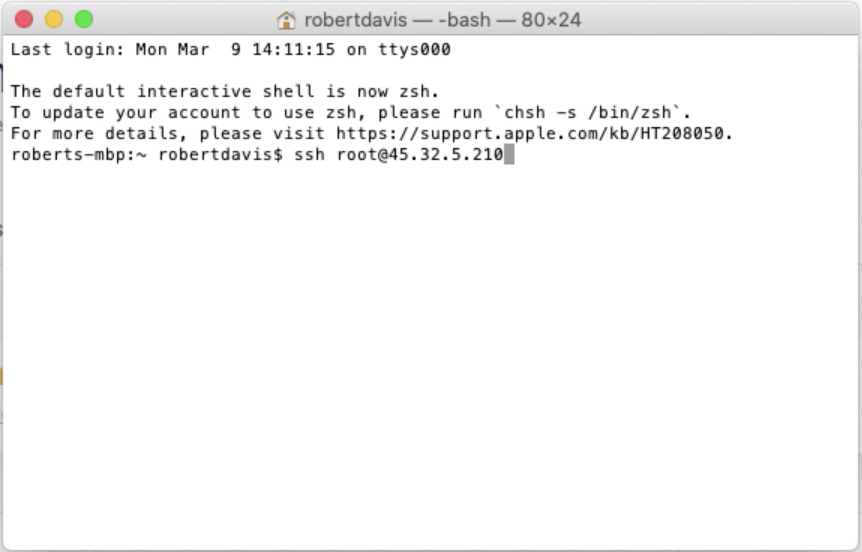
Type ssh root@your.server.ip press Enter and type yes to connect
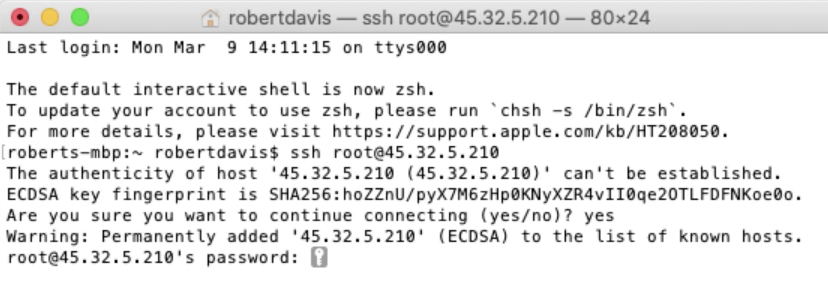
Paste in (or manually type if that’s your thing) the root password we copied from the previous step. Press enter. Next, we’ll install TeslaMate!
If you’re on windows, download the application PuTTy.
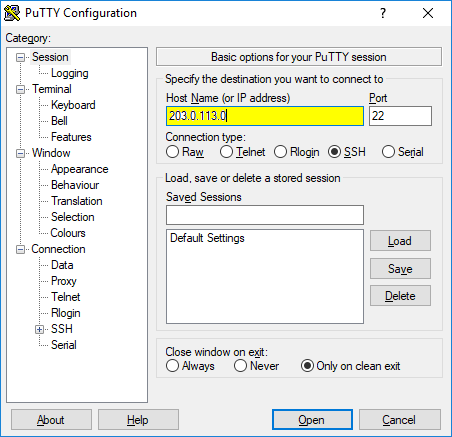
Enter your your.server.ip and Port 22. Ensure SSH is selected and press open to connect. Sign in with the root username and your root password.
Next, we’ll install TeslaMate!
Once you’re all logged in, type sudo nano docker-compose.yml and copy and paste the following box of code. Once it’s pasted, press control + x to exit, Y to save, Enter to save file

docker-compose.yml
version: '3'

services:
  teslamate:
    image: teslamate/teslamate:latest
    restart: always
    depends_on:
      - database
    environment:
      - DATABASE_USER=${TM_DB_USER}
      - DATABASE_PASS=${TM_DB_PASS}
      - DATABASE_NAME=${TM_DB_NAME}
      - DATABASE_HOST=database
      - MQTT_HOST=mosquitto
      - VIRTUAL_HOST=${FQDN_TM}
      - CHECK_ORIGIN=true
      - TZ=${TM_TZ}
    volumes:
      - ./import:/opt/app/import
    labels:
      - 'traefik.enable=true'
      - 'traefik.port=4000'
      - "traefik.http.middlewares.redirect.redirectscheme.scheme=https"
      - "traefik.http.middlewares.auth.basicauth.usersfile=/auth/.htpasswd"
      - "traefik.http.routers.teslamate-insecure.rule=Host(`${FQDN_TM}`)"
      - "traefik.http.routers.teslamate-insecure.middlewares=redirect"
      - "traefik.http.routers.teslamate.rule=Host(`${FQDN_TM}`)"
      - "traefik.http.routers.teslamate.middlewares=auth"
      - "traefik.http.routers.teslamate.entrypoints=websecure"
      - "traefik.http.routers.teslamate.tls.certresolver=tmhttpchallenge"

  database:
    image: postgres:12
    restart: always
    environment:
      - POSTGRES_USER=${TM_DB_USER}
      - POSTGRES_PASSWORD=${TM_DB_PASS}
      - POSTGRES_DB=${TM_DB_NAME}
    volumes:
      - teslamate-db:/var/lib/postgresql/data

  grafana:
    image: teslamate/grafana:latest
    restart: always
    environment:
      - DATABASE_USER=${TM_DB_USER}
      - DATABASE_PASS=${TM_DB_PASS}
      - DATABASE_NAME=${TM_DB_NAME}
      - DATABASE_HOST=database
      - GRAFANA_PASSWD=${GRAFANA_PW}
      - GF_SECURITY_ADMIN_USER=${GRAFANA_USER}
      - GF_SECURITY_ADMIN_PASSWORD=${GRAFANA_PW}
      - GF_AUTH_BASIC_ENABLED=true
      - GF_AUTH_ANONYMOUS_ENABLED=false
      - GF_SERVER_ROOT_URL=https://${FQDN_GRAFANA}
    volumes:
      - teslamate-grafana-data:/var/lib/grafana
    labels:
      - 'traefik.enable=true'
      - 'traefik.port=3000'
      - "traefik.http.middlewares.redirect.redirectscheme.scheme=https"
      - "traefik.http.routers.grafana-insecure.rule=Host(`${FQDN_GRAFANA}`)"
      - "traefik.http.routers.grafana-insecure.middlewares=redirect"
      - "traefik.http.routers.grafana.rule=Host(`${FQDN_GRAFANA}`)"
      - "traefik.http.routers.grafana.entrypoints=websecure"
      - "traefik.http.routers.grafana.tls.certresolver=tmhttpchallenge"

  mosquitto:
    image: eclipse-mosquitto:1.6
    restart: always
    ports:
      - 127.0.0.1:1883:1883
    volumes:
      - mosquitto-conf:/mosquitto/config
      - mosquitto-data:/mosquitto/data

  proxy:
    image: traefik:v2.1
    restart: always
    command:
      - "--global.sendAnonymousUsage=false"
      - "--providers.docker"
      - "--providers.docker.exposedByDefault=false"
      - "--entrypoints.web.address=:80"
      - "--entrypoints.websecure.address=:443"
      - "--certificatesresolvers.tmhttpchallenge.acme.httpchallenge=true"
      - "--certificatesresolvers.tmhttpchallenge.acme.httpchallenge.entrypoint=web"
      - "--certificatesresolvers.tmhttpchallenge.acme.email=${LETSENCRYPT_EMAIL}"
      - "--certificatesresolvers.tmhttpchallenge.acme.storage=/etc/acme/acme.json"
    ports:
      - 80:80
      - 443:443
    volumes:
      - ./.htpasswd:/auth/.htpasswd
      - ./acme/:/etc/acme/
      - /var/run/docker.sock:/var/run/docker.sock:ro

volumes:
    teslamate-db:
    teslamate-grafana-data:
    mosquitto-conf:
    mosquitto-data:
Next we’ll create the .env file.
Type sudo nano .env and paste in the code below. Replace the highlighted items (your domain, time zone, and email address) with your values. Unsure of how to enter your time zone? Click here.
.env
TM_DB_USER=teslamate
TM_DB_PASS=secret
TM_DB_NAME=teslamate

GRAFANA_USER=admin
GRAFANA_PW=admin

FQDN_GRAFANA=grafana.example.com
FQDN_TM=teslamate.example.com

TM_TZ=Europe/Berlin

LETSENCRYPT_EMAIL=yourperson@example.com
Once it’s pasted and customized, press control + x to exit, Y to save, Enter to save file
The last file we’re creating is .htpasswd which will be used to secure our server. This file contains a user and password for accessing TeslaMate via any browser (note this is NOT your tesla.com password).
Generate your .htpasswd on the web by visiting:
http://www.htaccesstools.com/htpasswd-generator/
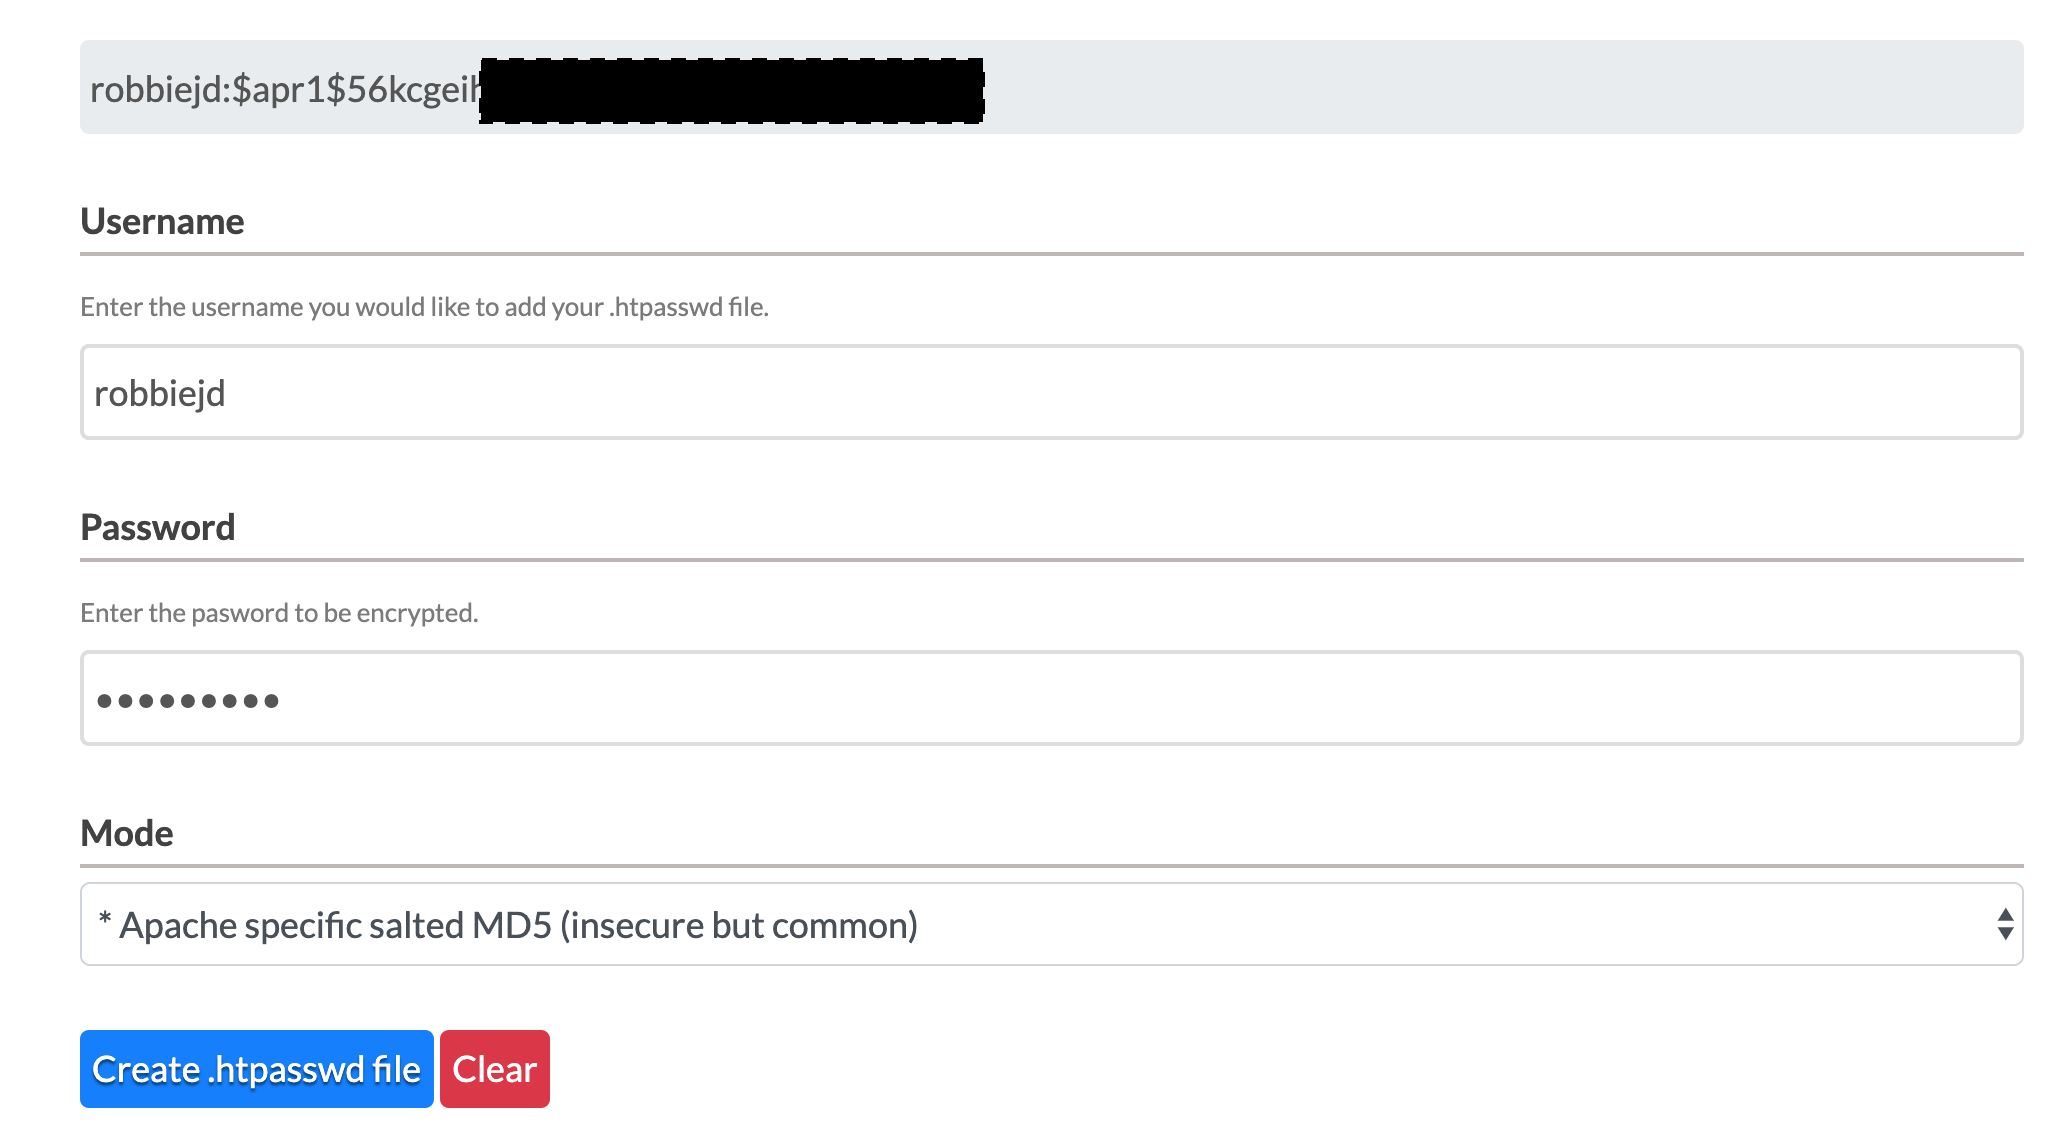
Select the Mode: * Apache specific salted… and press the Create .htpasswd file button, copy the text in the box that appears above the form. This is what we’ll paste into our .htpasswd file
.htpasswd
youruserhere:$apr1$0hau3aWq$yzNEh.ABwZBAIEYZ6WfbH/
Almost done!
Let’s tell Vultr about our new domain.
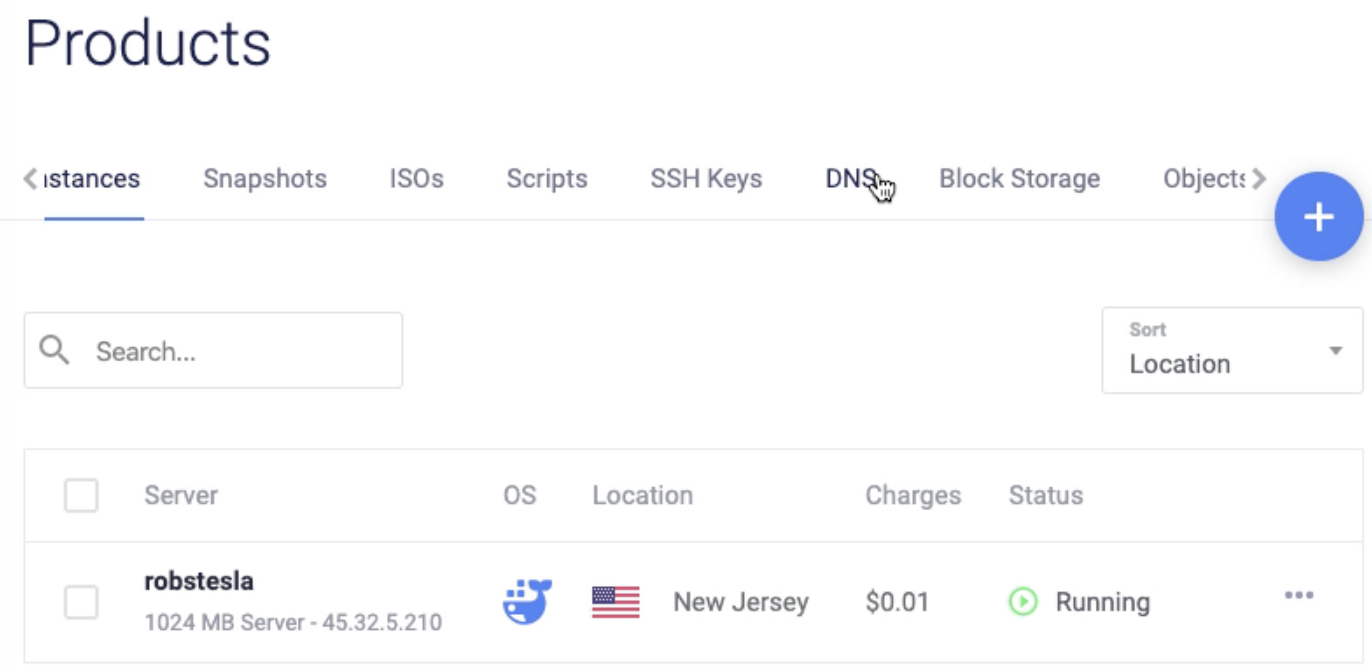
Let’s tell Vultr about our new domain. Navigate to the Products page and click on DNS

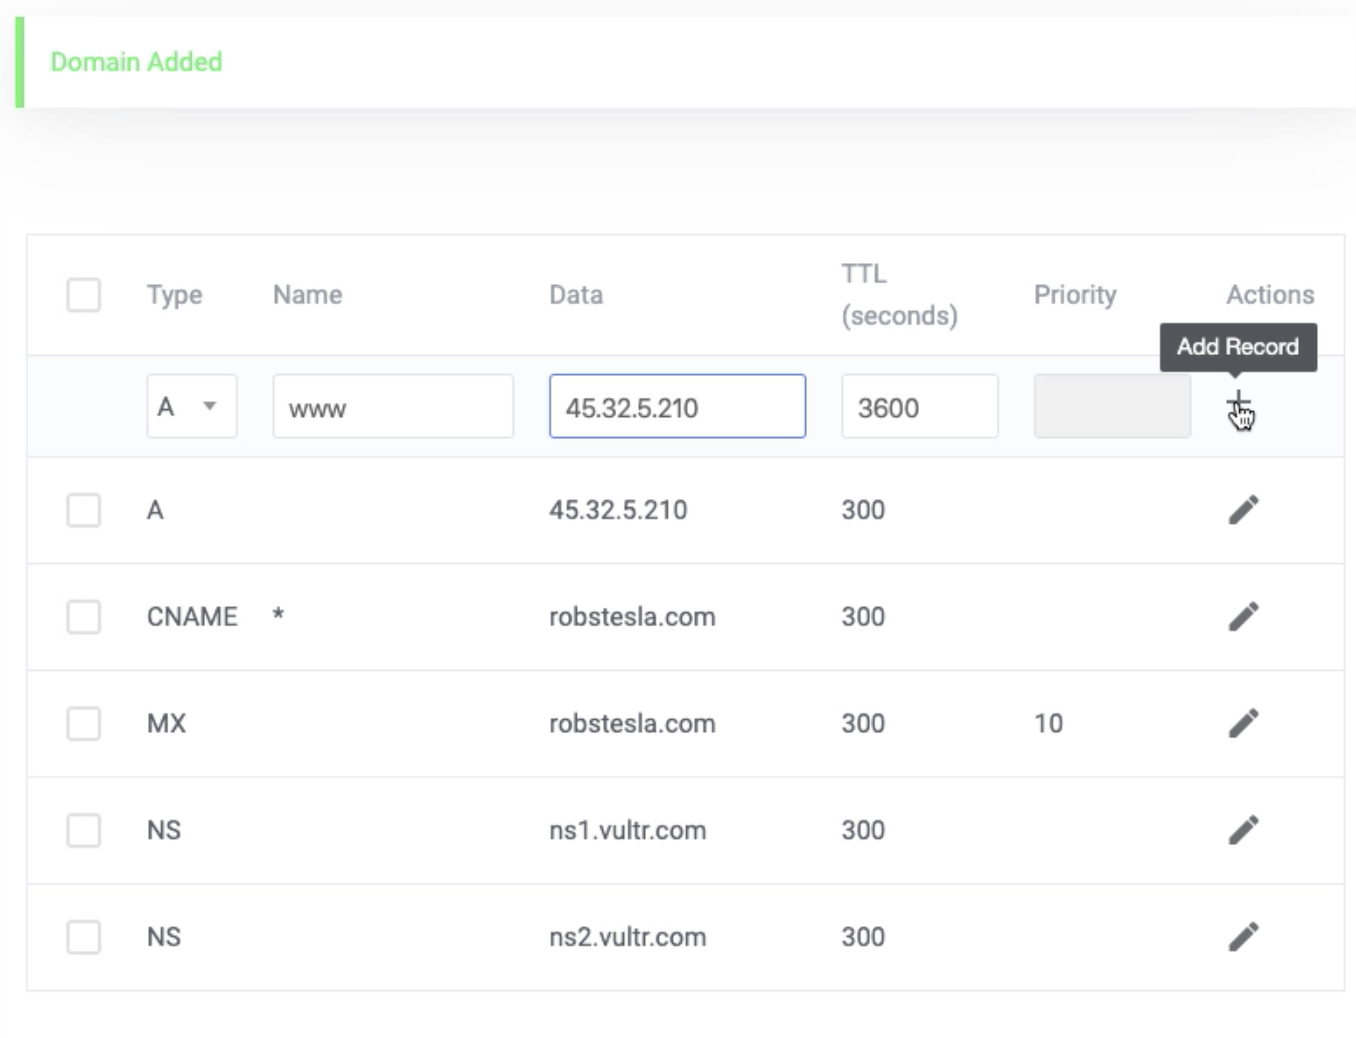
Add yourdomain.com and your Vultr server IP address (don’t include www). Press Add
We need a total of 4 A records added. The first has already been included which is rightfully blank. This record points to yourdomain.com. The second A record should point to www and the same IP address. Click Add Record.
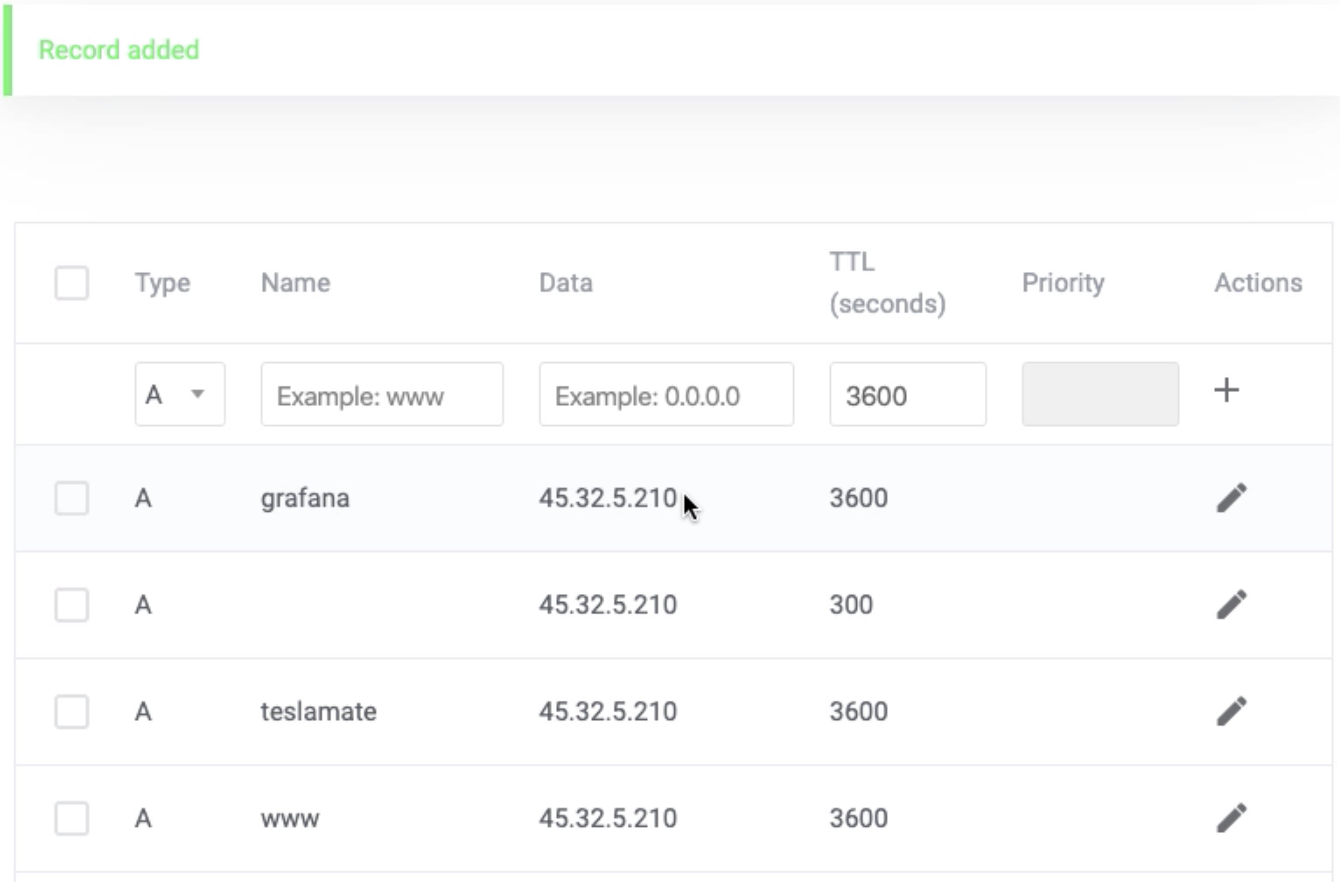
The remaining two are grafana and teslamate. Go ahead an add those in as well.
We’re all set with the DNS tab. We can head back over to our command line in either Terminal or PuTTy.
Now we can turn TeslaMate on:
Let’s make sure we have docker-composer installed by running the following command:
apt install docker-compose -y
When that completes, turn TeslaMate on by typing:
docker-compose up -d
Once that completes, let’s move onto the next section to login and configure TeslaMate
Log into TeslaMate by visiting teslamate.yourdomain.com. You’ll be prompted for a username and password. This is where you’ll enter the values that you input to create the .htpasswd file. You’ll need to re-enter this whenever you try to access TeslaMate from a new device.
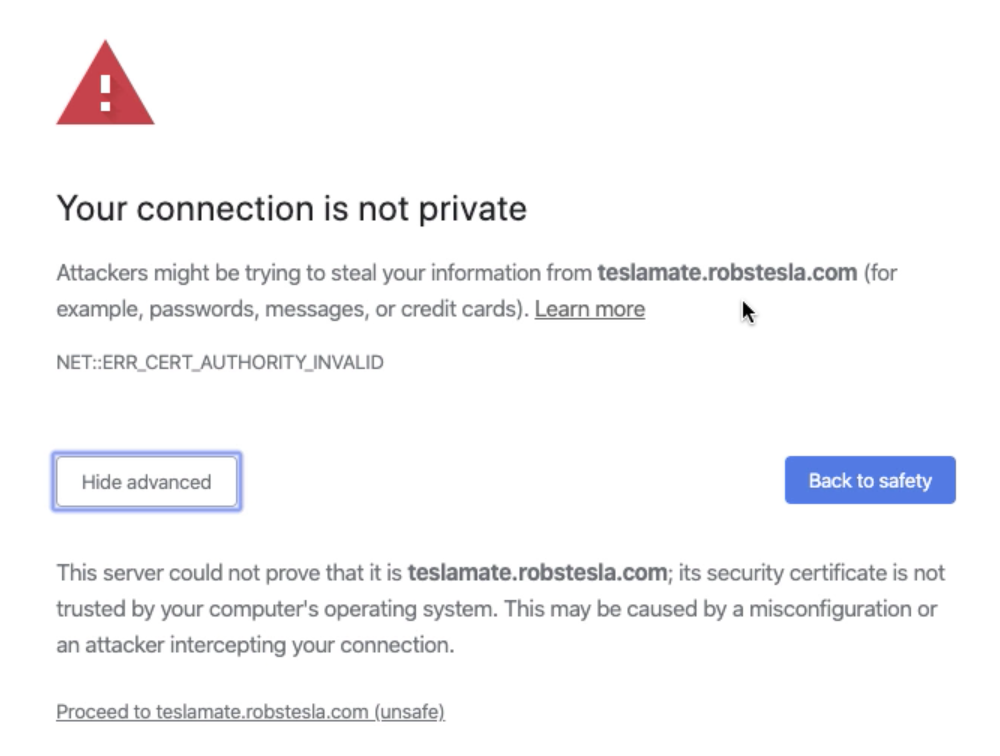
You may see this message. Not to worry, this is due to the recency of spinning up the server and matching up the SSL cert with your DNS record which can take sometime to propagate across the internet. This message only appeared when first launching the server and never popped up again. A few seconds later the logon prompt auto appeared.

Enter the user and pass you input in the .htpasswd tool to create the long string of text
Next we’ll use our Tesla login to generate a token that TeslaMate will use to access our Tesla’s data. You’ll only need to do this one time and your password will not be stored.

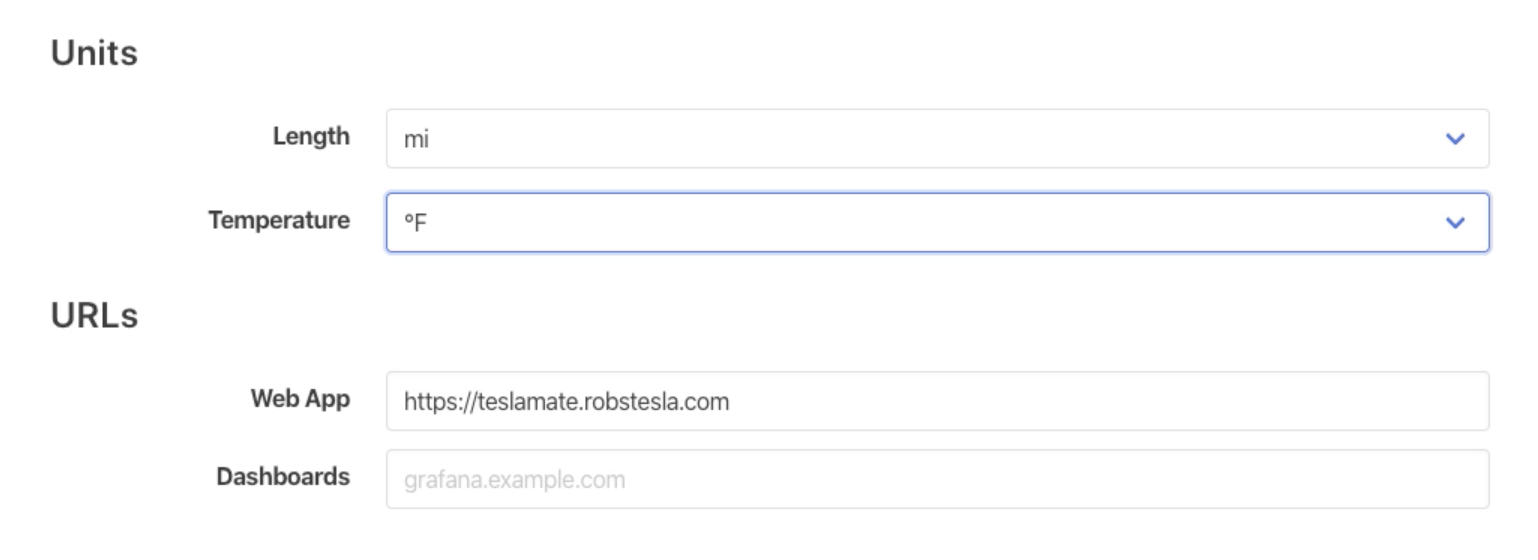
After you log in, go ahead and open the Tesla app on your phone to wake your Tesla up. After a few seconds you should see a current location along with additional stats. Depending on where you’re located, you may want to update km to mi and C to F. This can be updated within the Settings menu
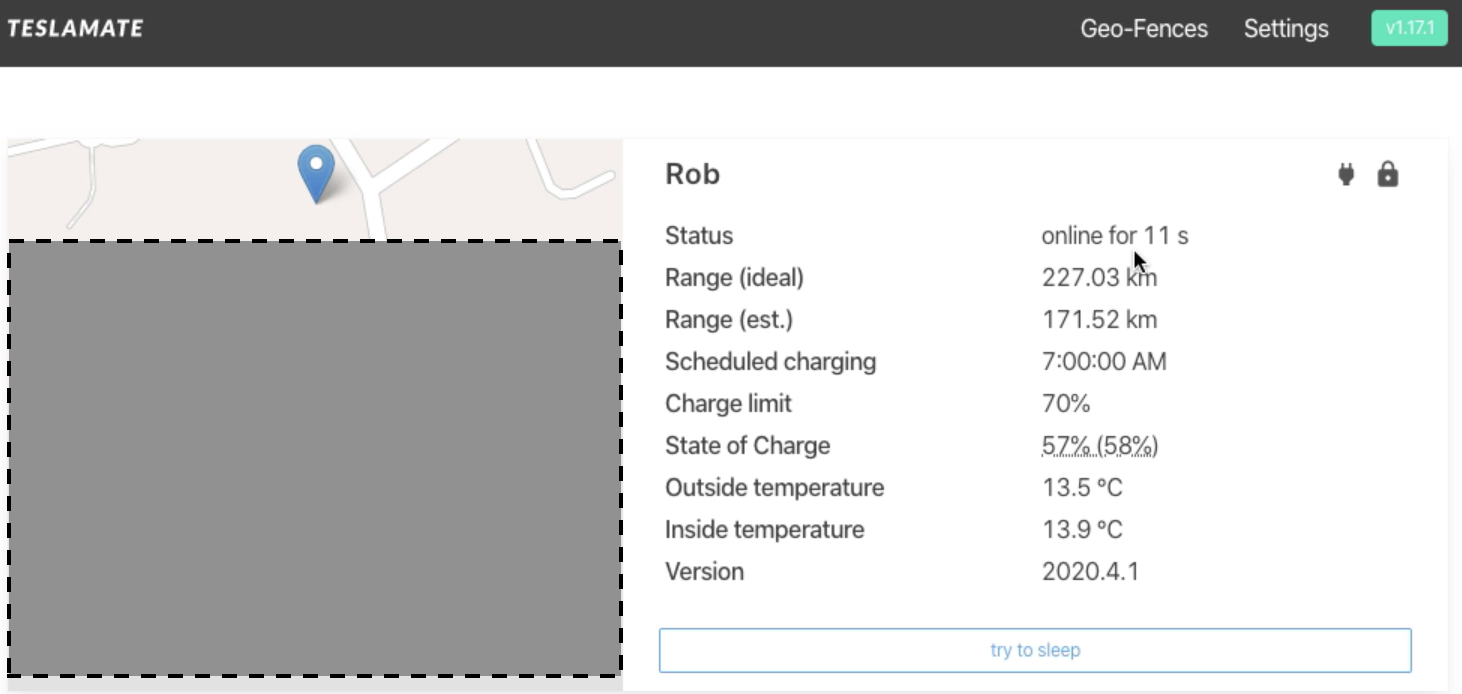
Also make sure to add https://grafana.yourdomain.com to the Dashboards field at the bottom of the page so the dashboard menu item appears within TeslaMate
Next we’ll take a look at how to log into Grafana and view dashboards
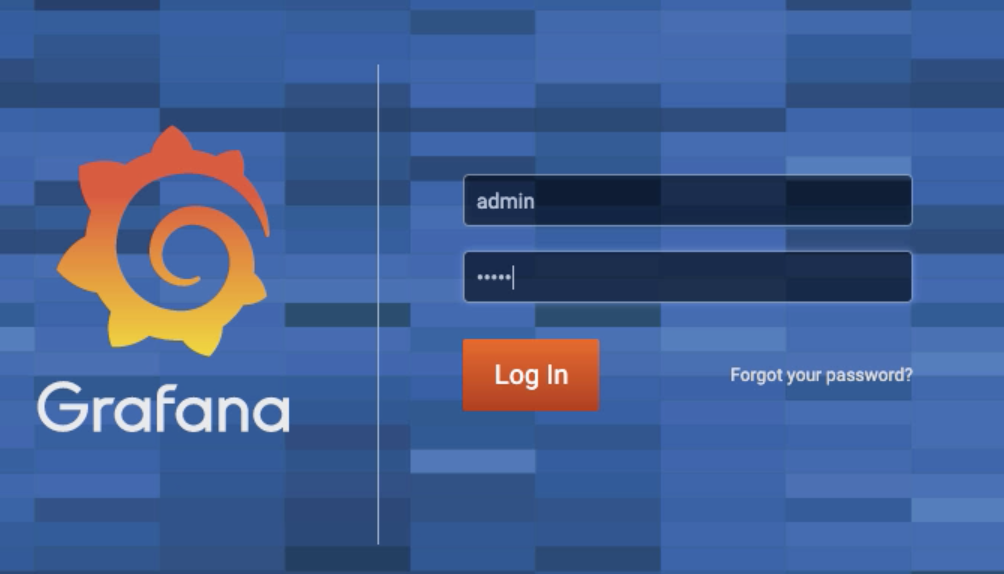
Navigate to grafana.yourdomain.com, the initial login is admin / admin. You’ll be prompted to change this password after signing in, go ahead and change it to whatever you’d like. In the future, you’ll continue to use admin as your user and the new password.
Your dashboards will look a bit barren until you start collecting some drive data. Let’s test that they’re working. Navigate to the Overview dashboard to see some basic info.
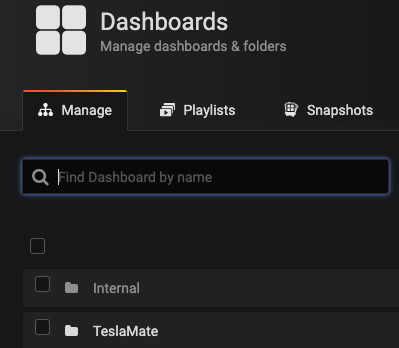
Navigate to Dashboards and Click Manage
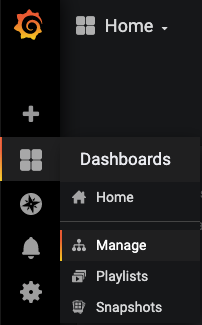
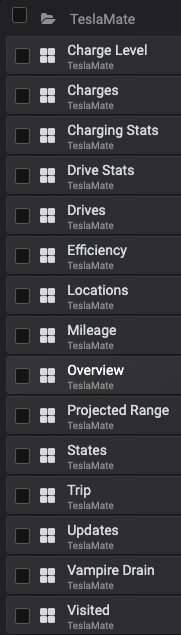
Click the TeslaMate folder
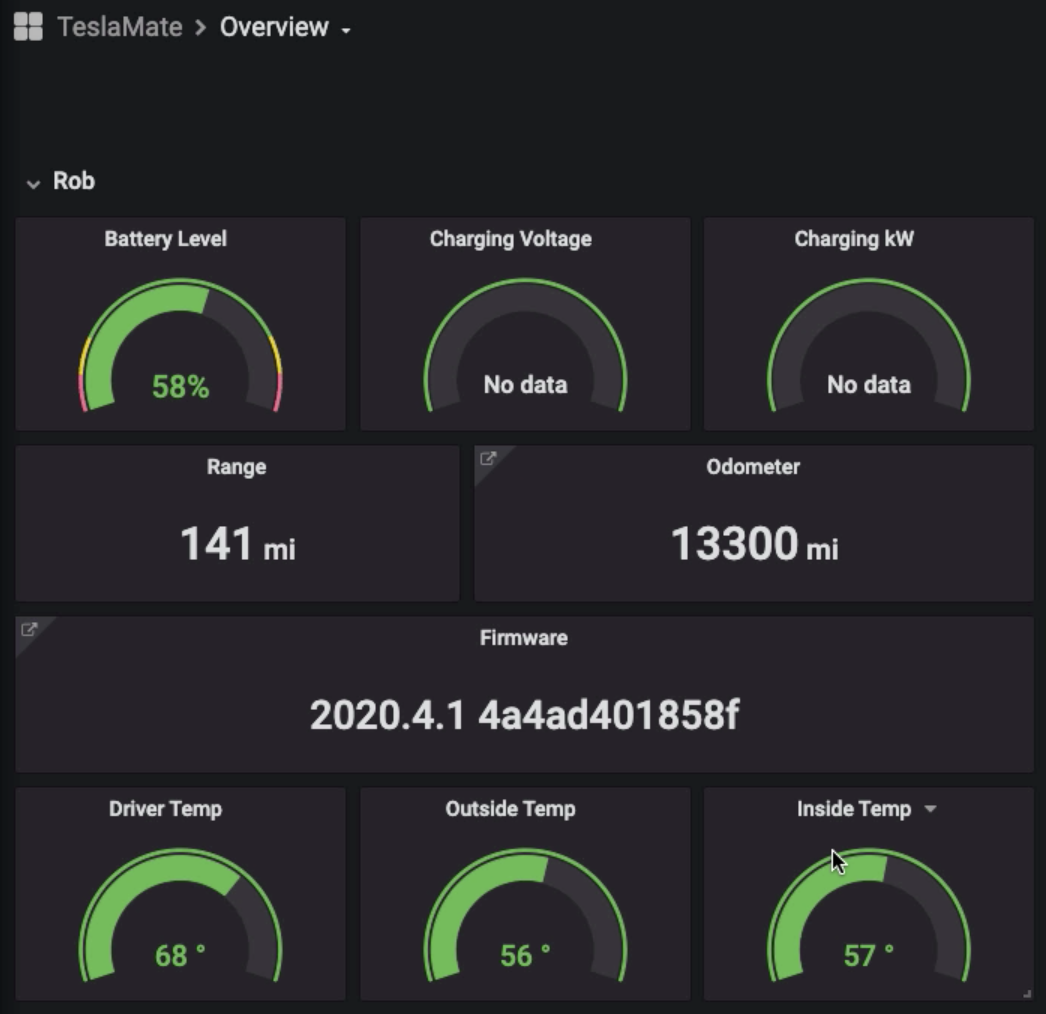
Click the Overview dashboard
Looks good!
 Feel free to explore all of the other dashboards to get a better sense for the kind of data that you can quickly visualize. Dashboards auto refresh and you also can toggle the time period you’re looking at at the top right of the screen. These look really cool on your Tesla screen. Also, if you’re feeling creative, you can customize your own dashboard(s).
Below I’ve linked some examples of what these dashboards look like after a couple of days of data collection.
Charge Level
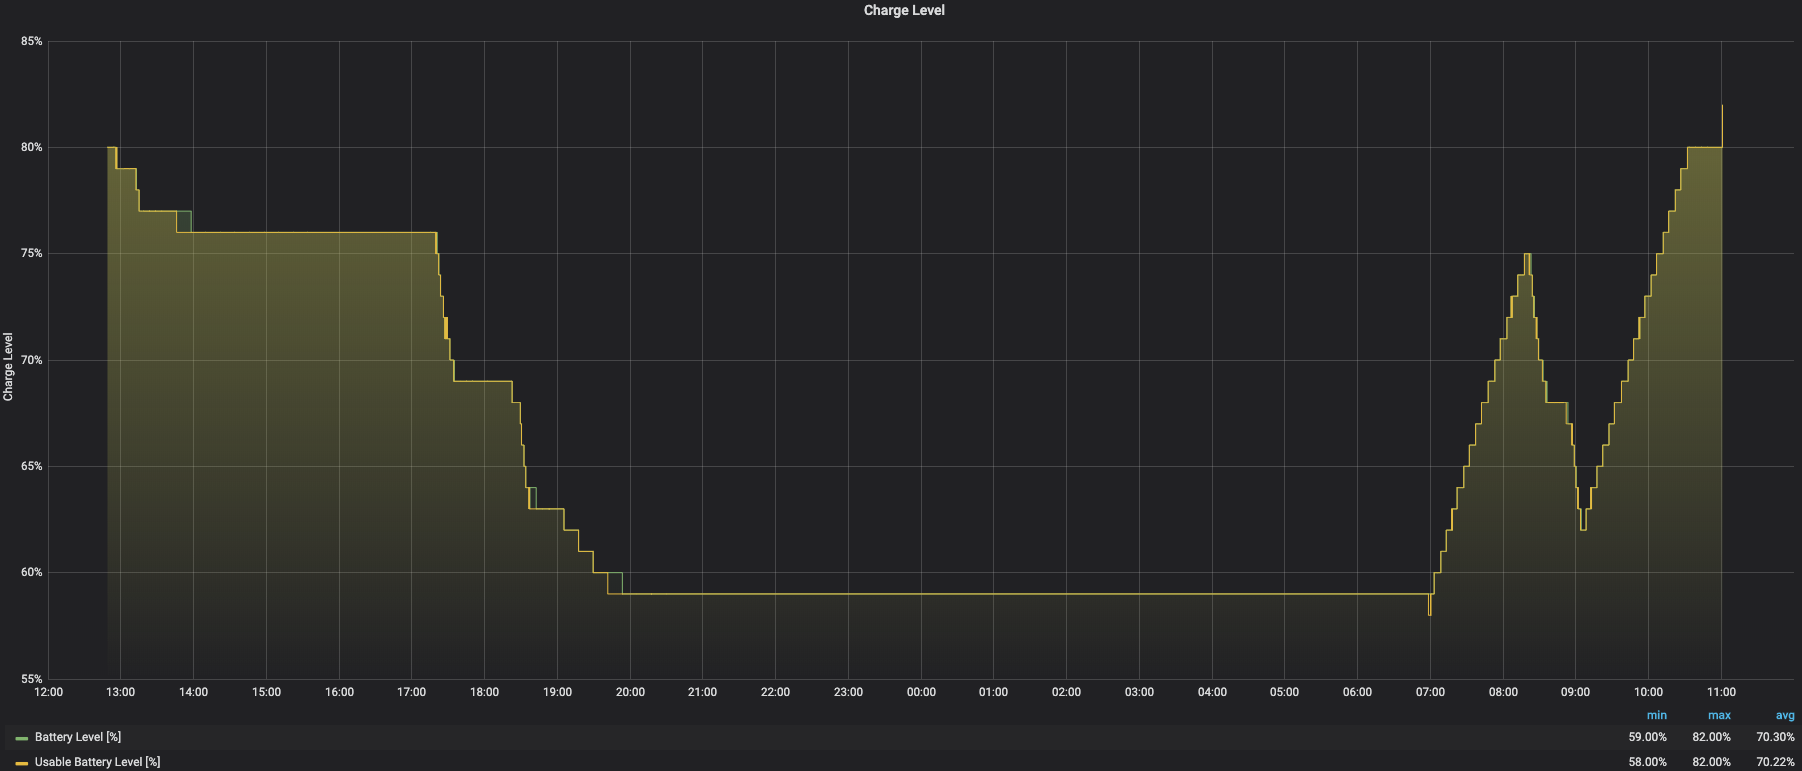
What’s my Tesla’s State of Charge look like over time
Charges
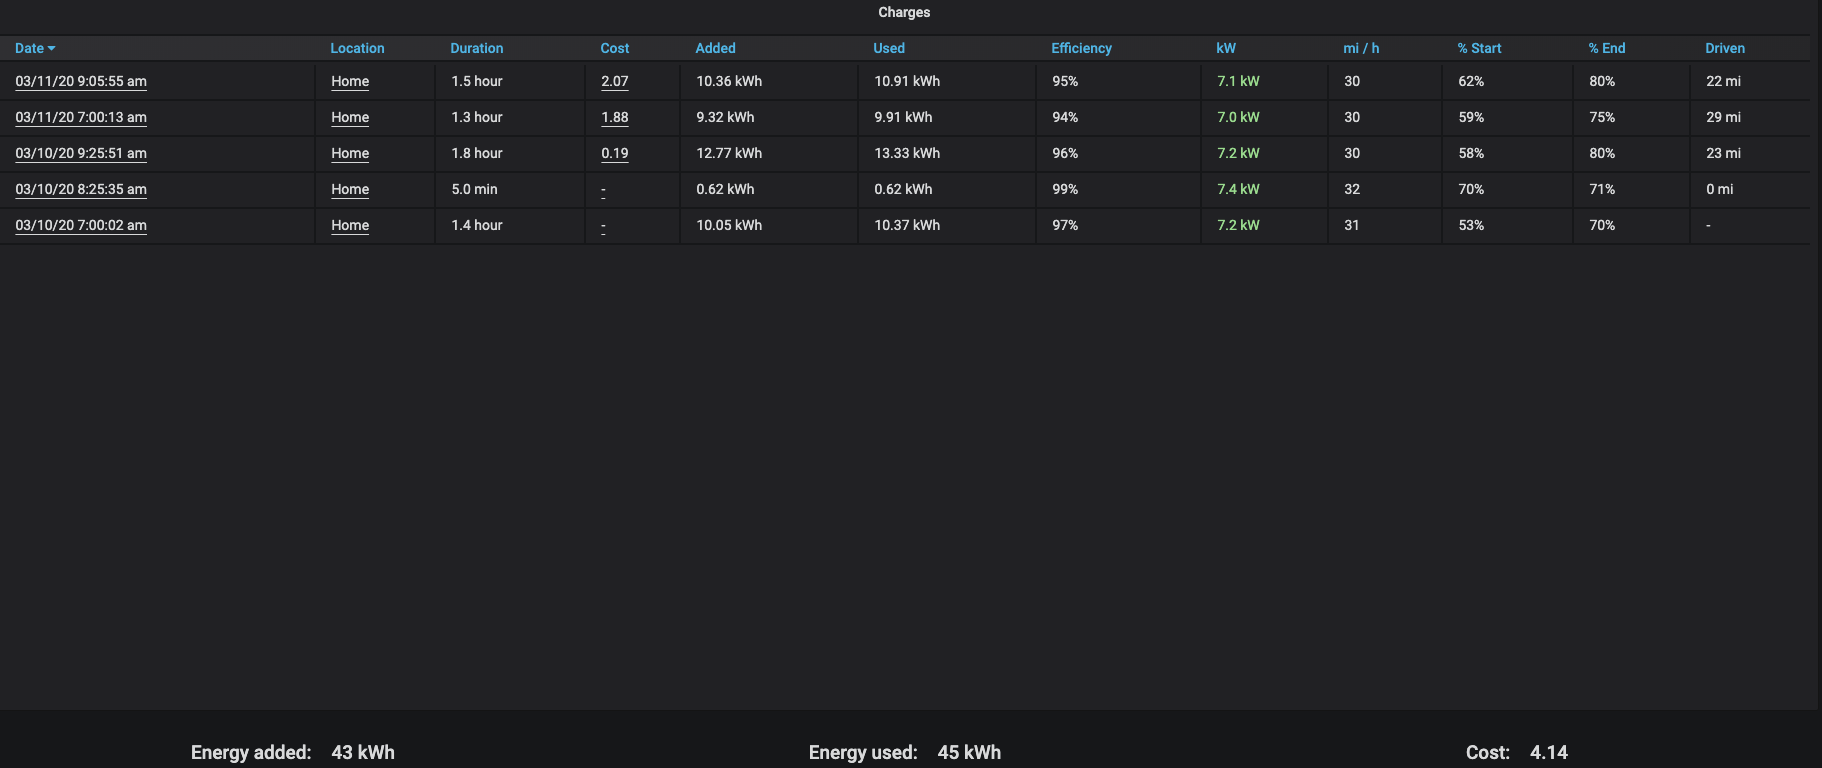
Easily set favorite locations and associated charging fees (per kWh)
Charging Stats
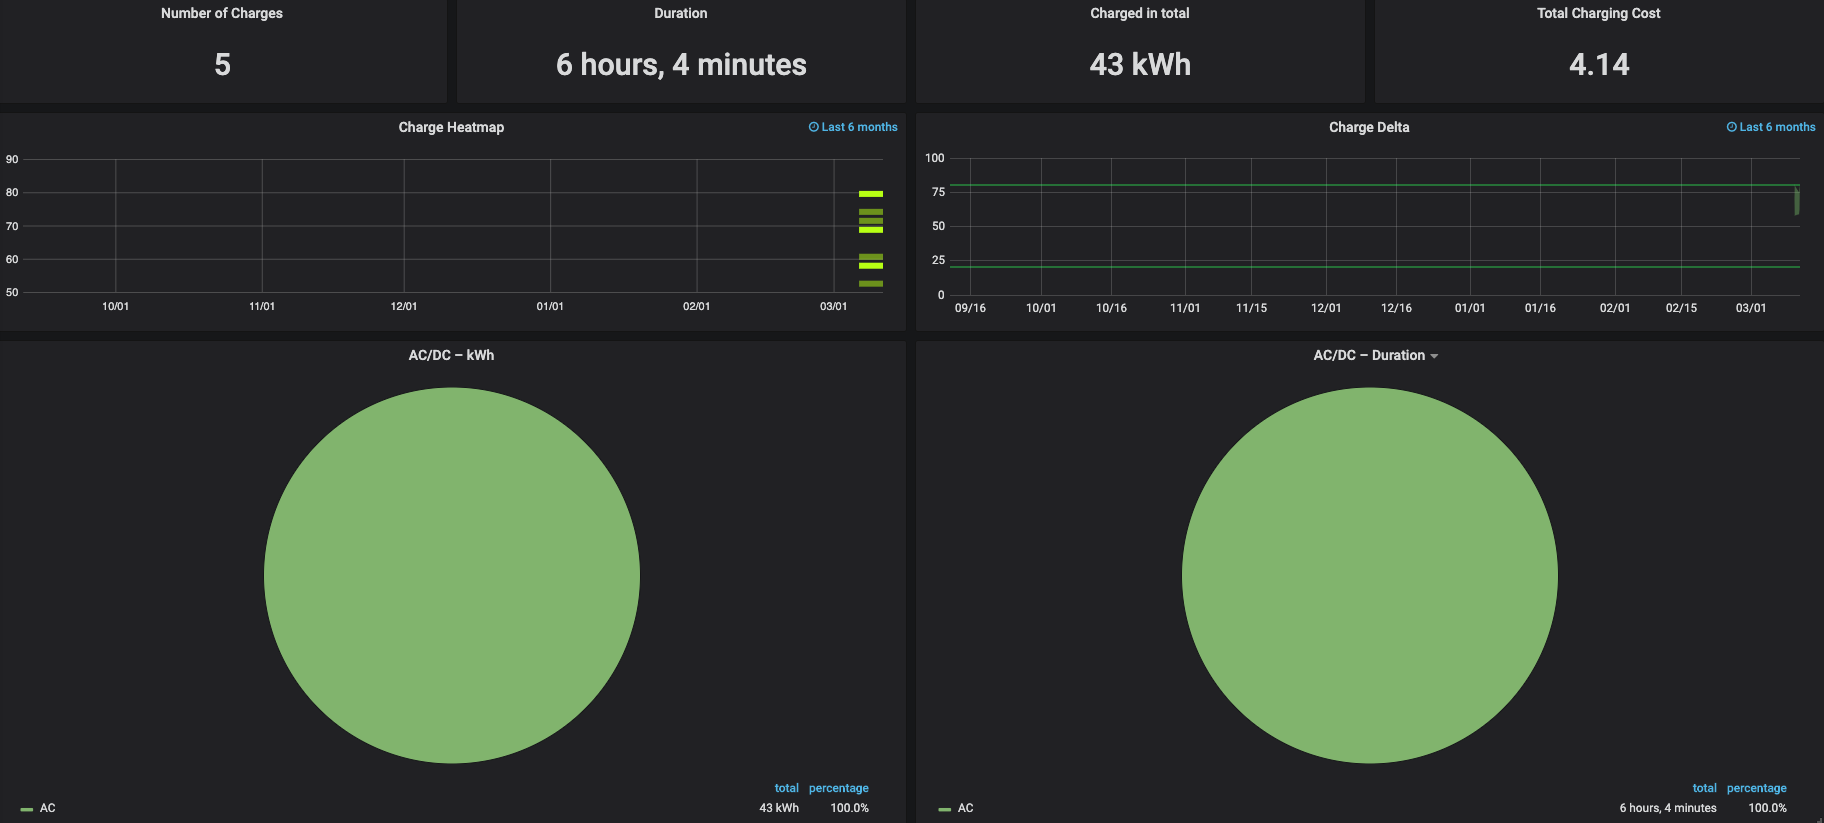

This has only been collecting data for 48 hours, but you can start to see the charts coming together
Drive Stats
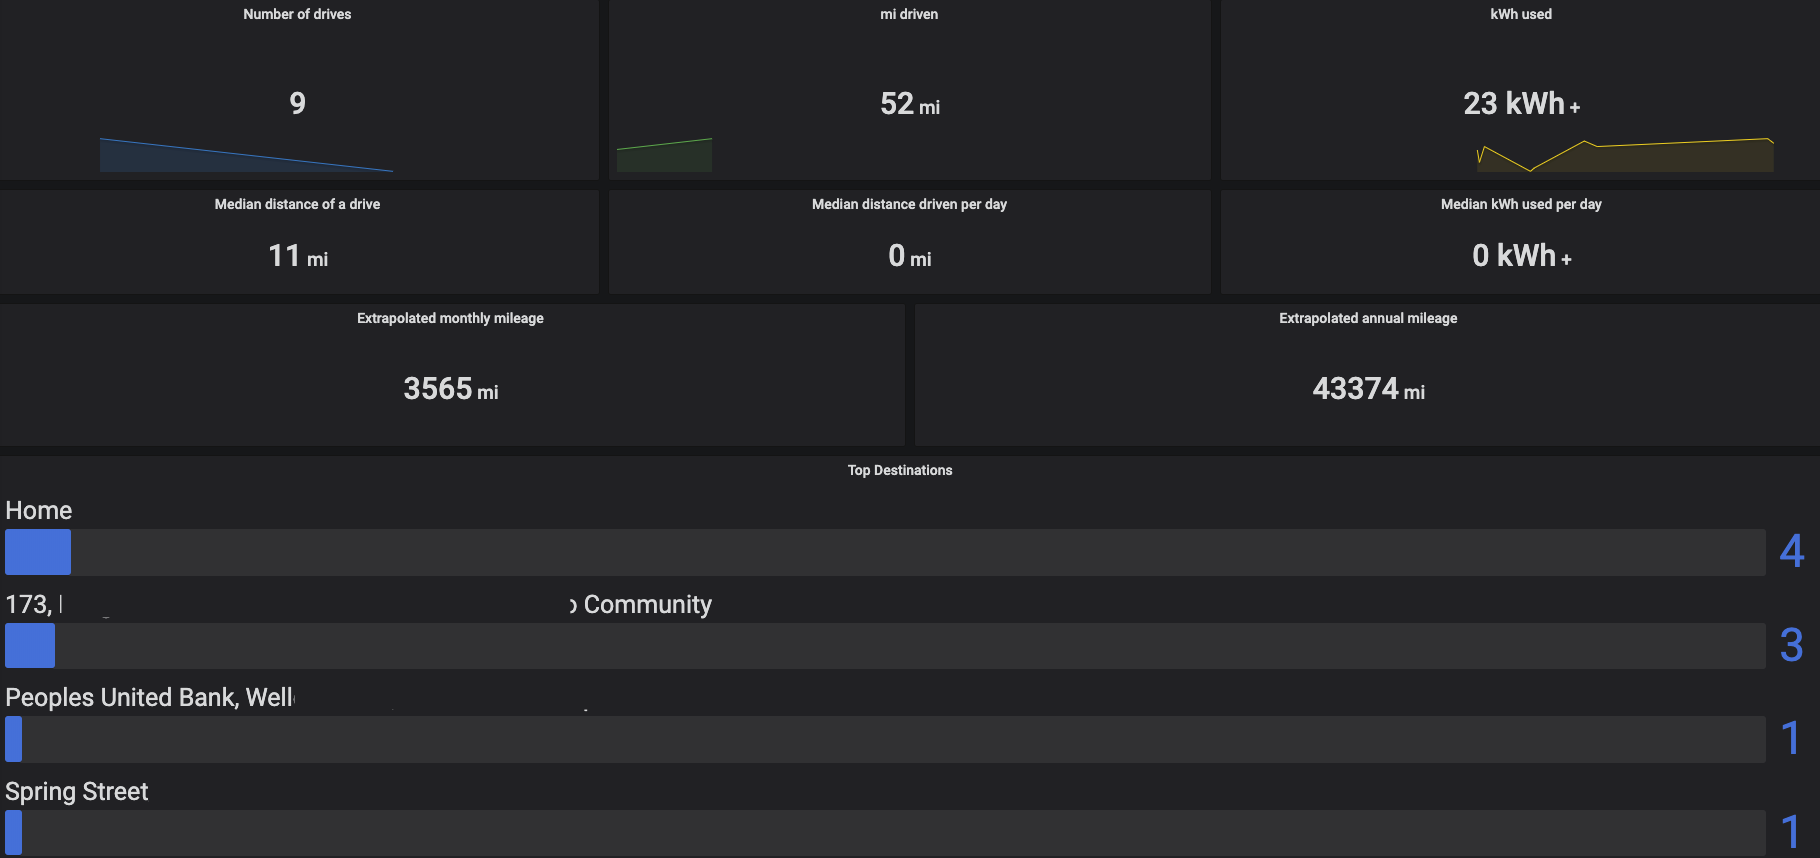
Where have you driven? How many times have you gone there? What’s your total power usage?
Drives
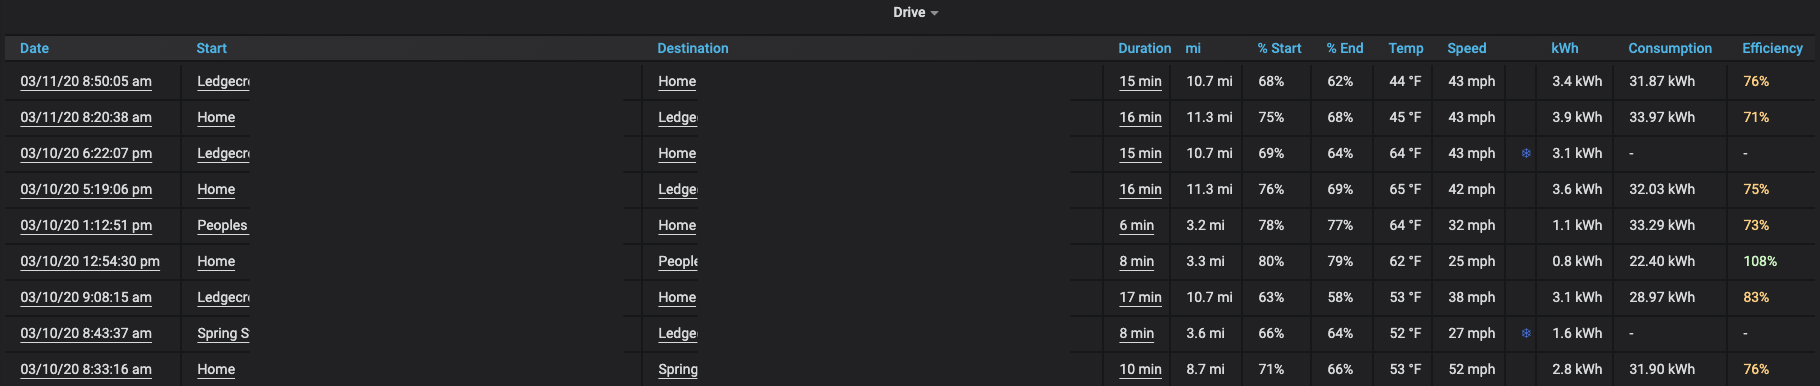
Where are you starting from and ending up? How long did the drive take, avg speed, distance? How was your efficiency? This is an awesome view for business travelers who need to log miles
Efficiency
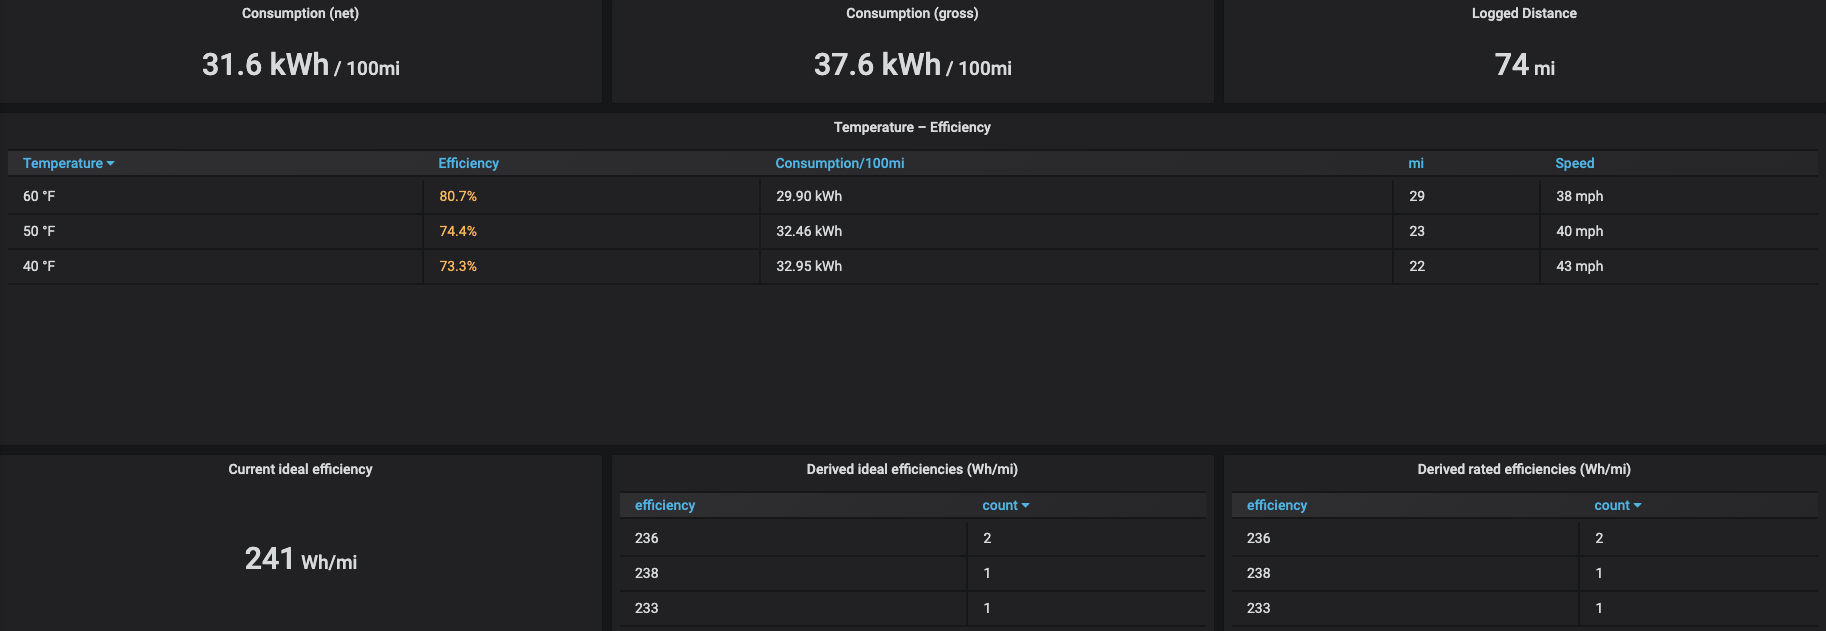
How does my driving efficiency look? Is temperature or speed playing a factor?
Locations
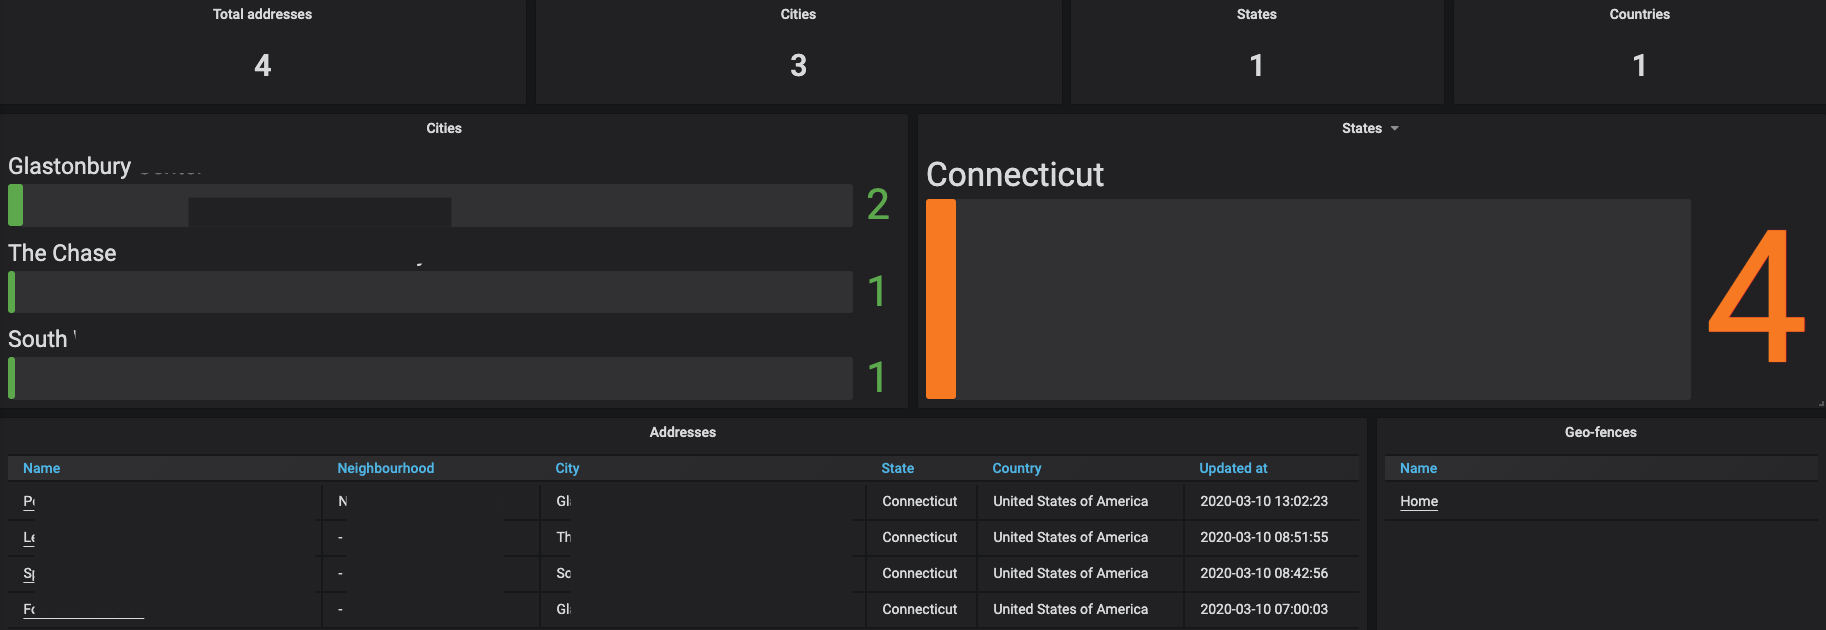
What addresses, cities, and states have I visited?
Mileage
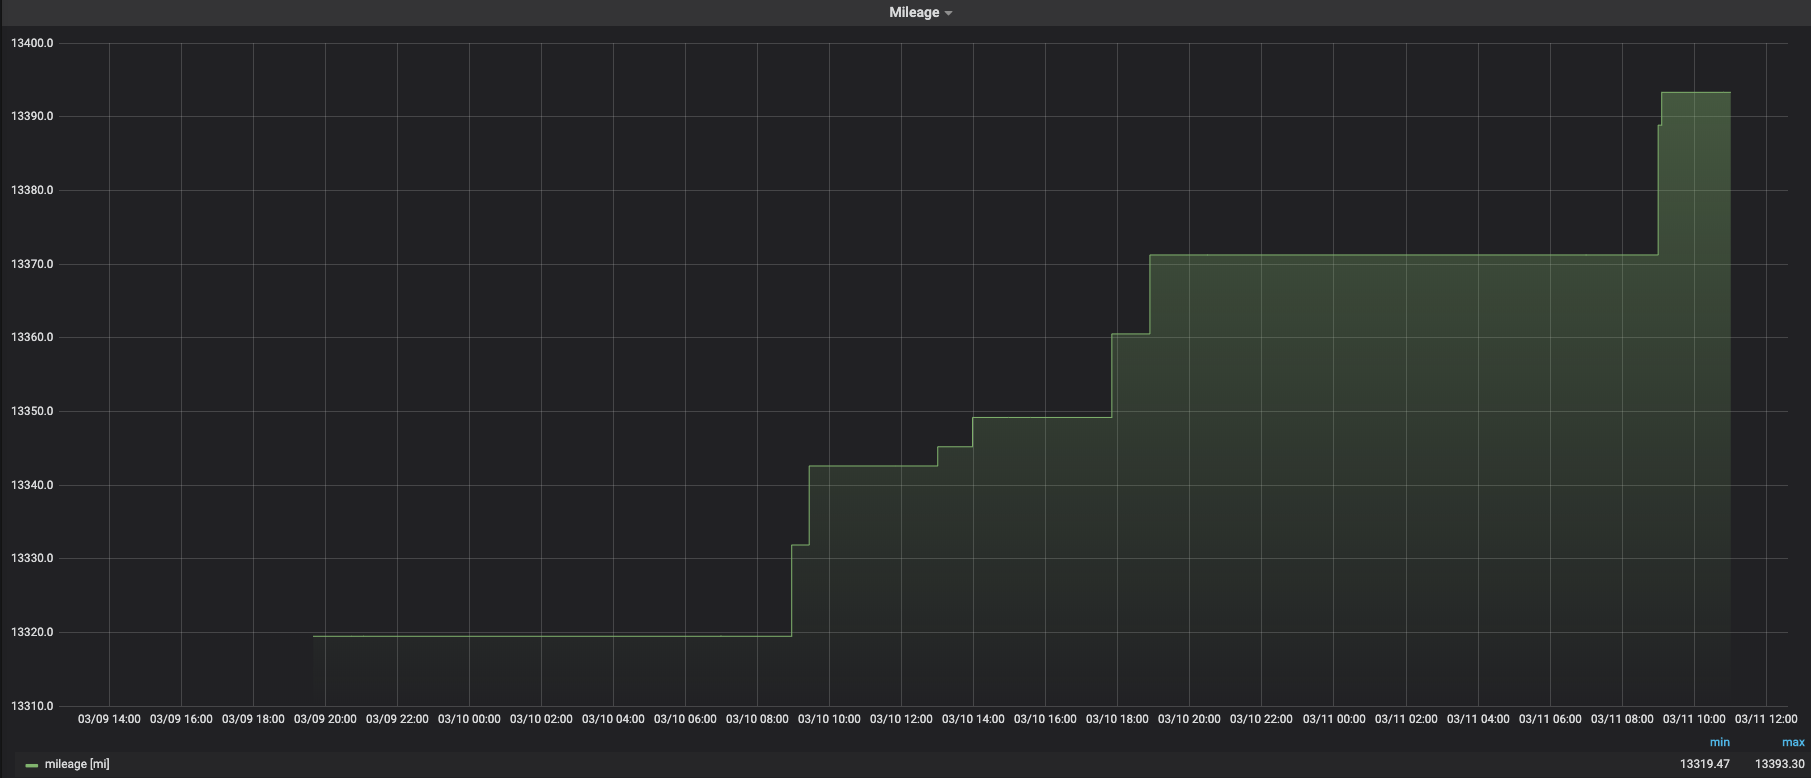
How many miles am I putting on the odometer over time?
Overview
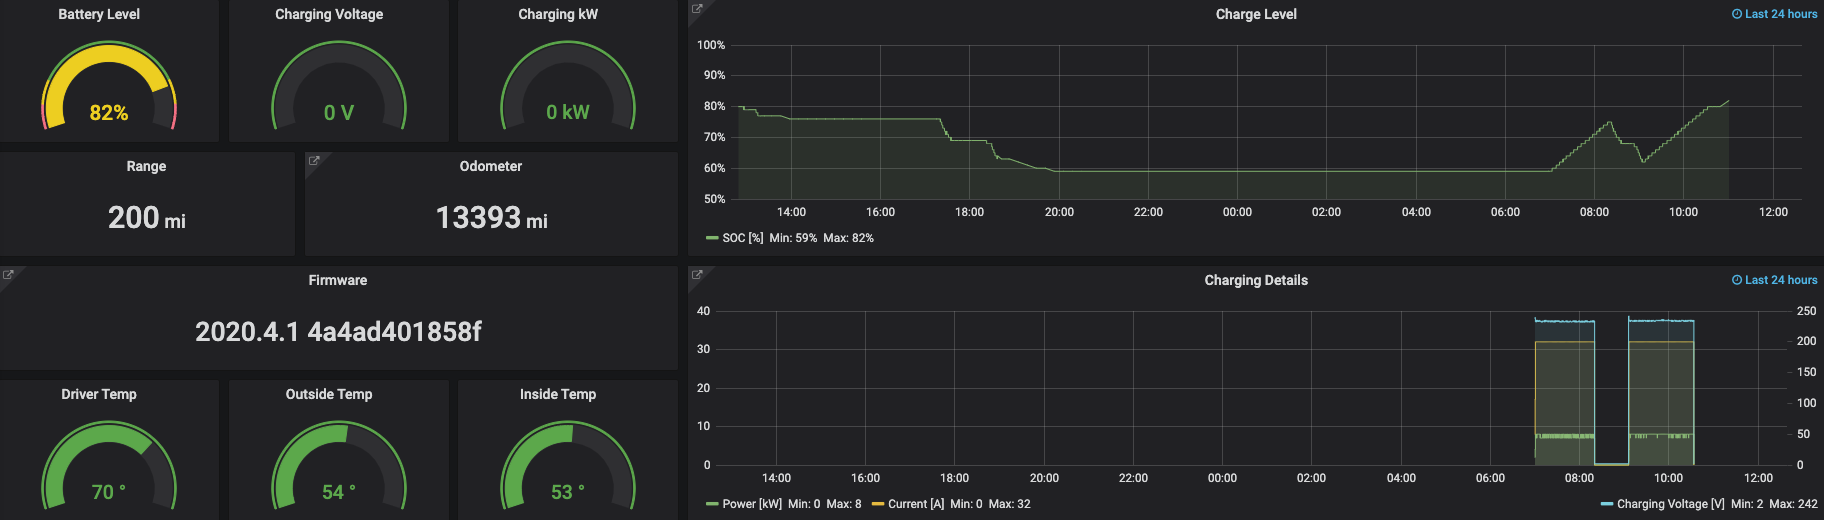
This dashboard captures battery, range, charge details, and temperature readings
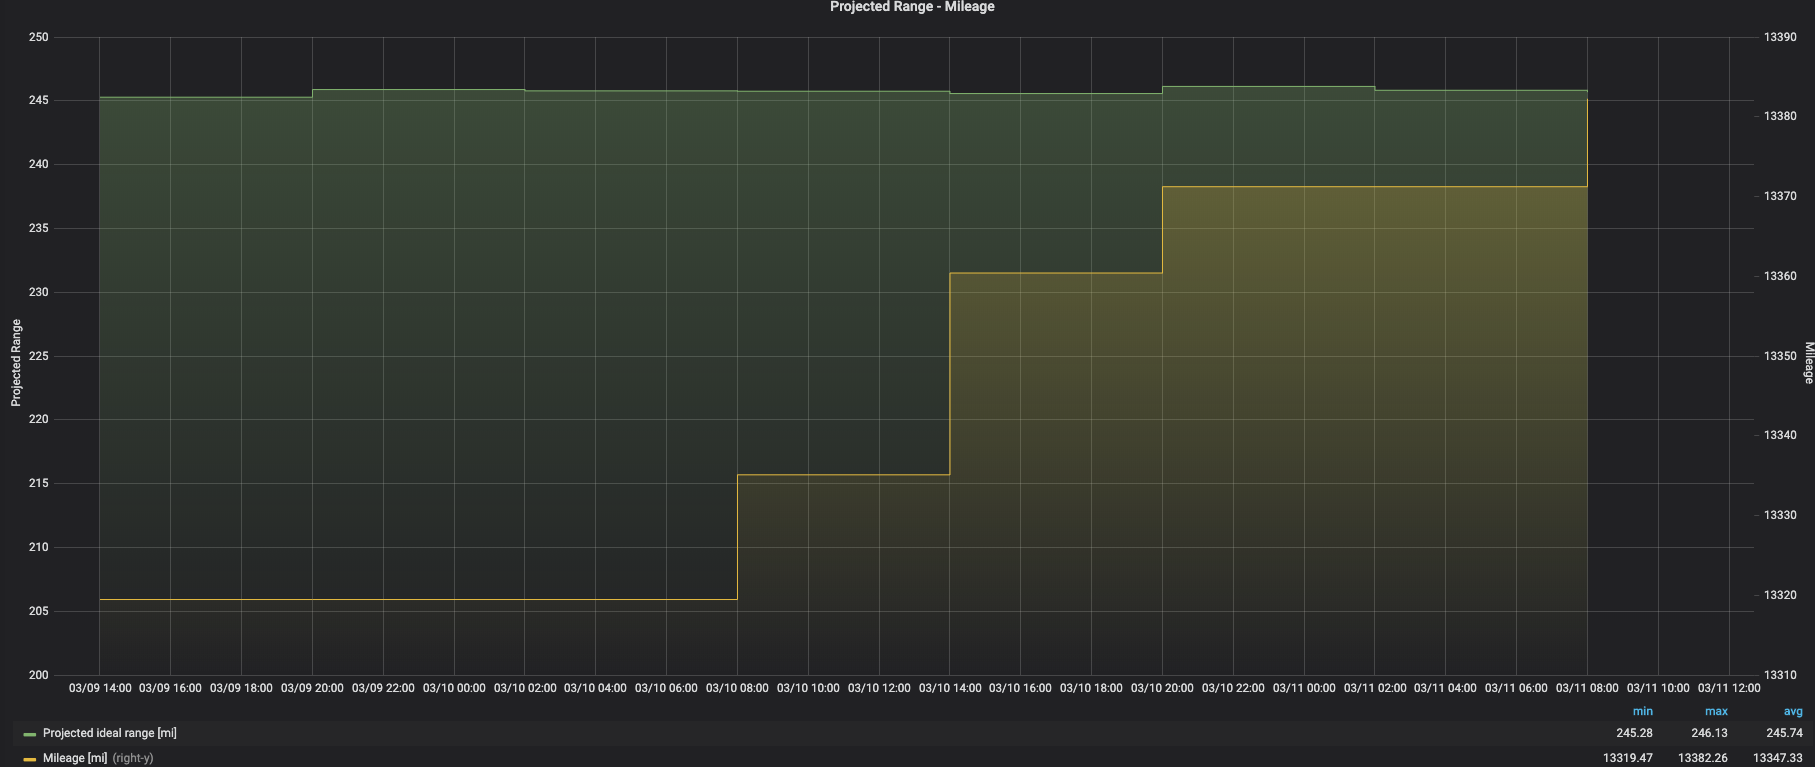
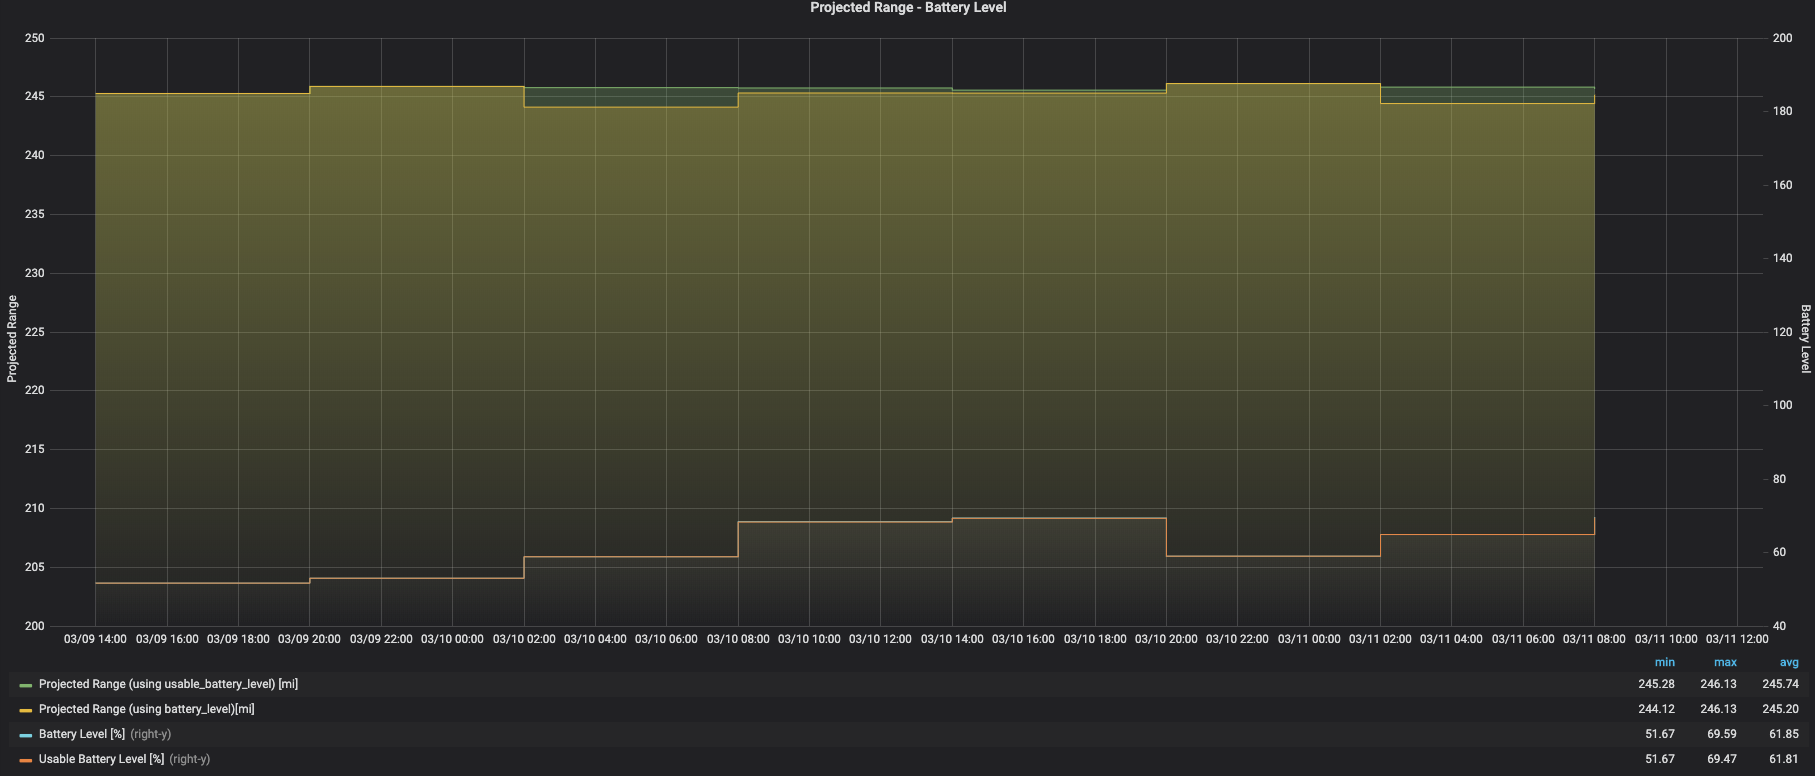
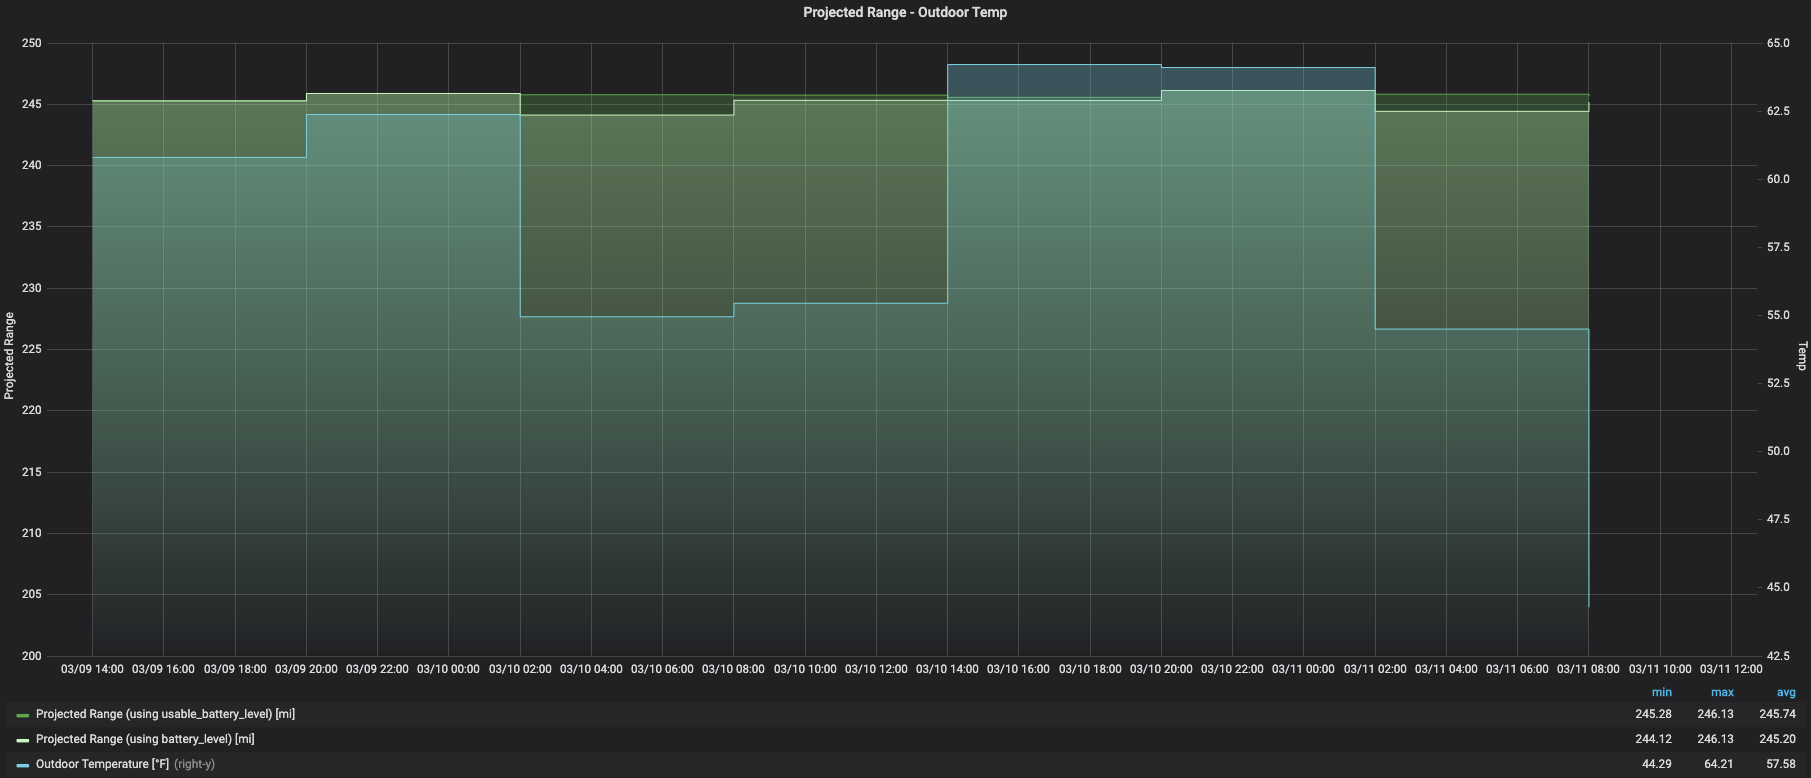
Projected Range – Mileage / Battery Level / Outdoor Temp
States

Over the past x # hours or days, what is the operational state of the Tesla? Is it parked, asleep, charging, driving? I can see why Elon want’s driverless cars. As you can see, my Tesla only spent 5% of the time driving (purple bars) and 95% idle.
Trip
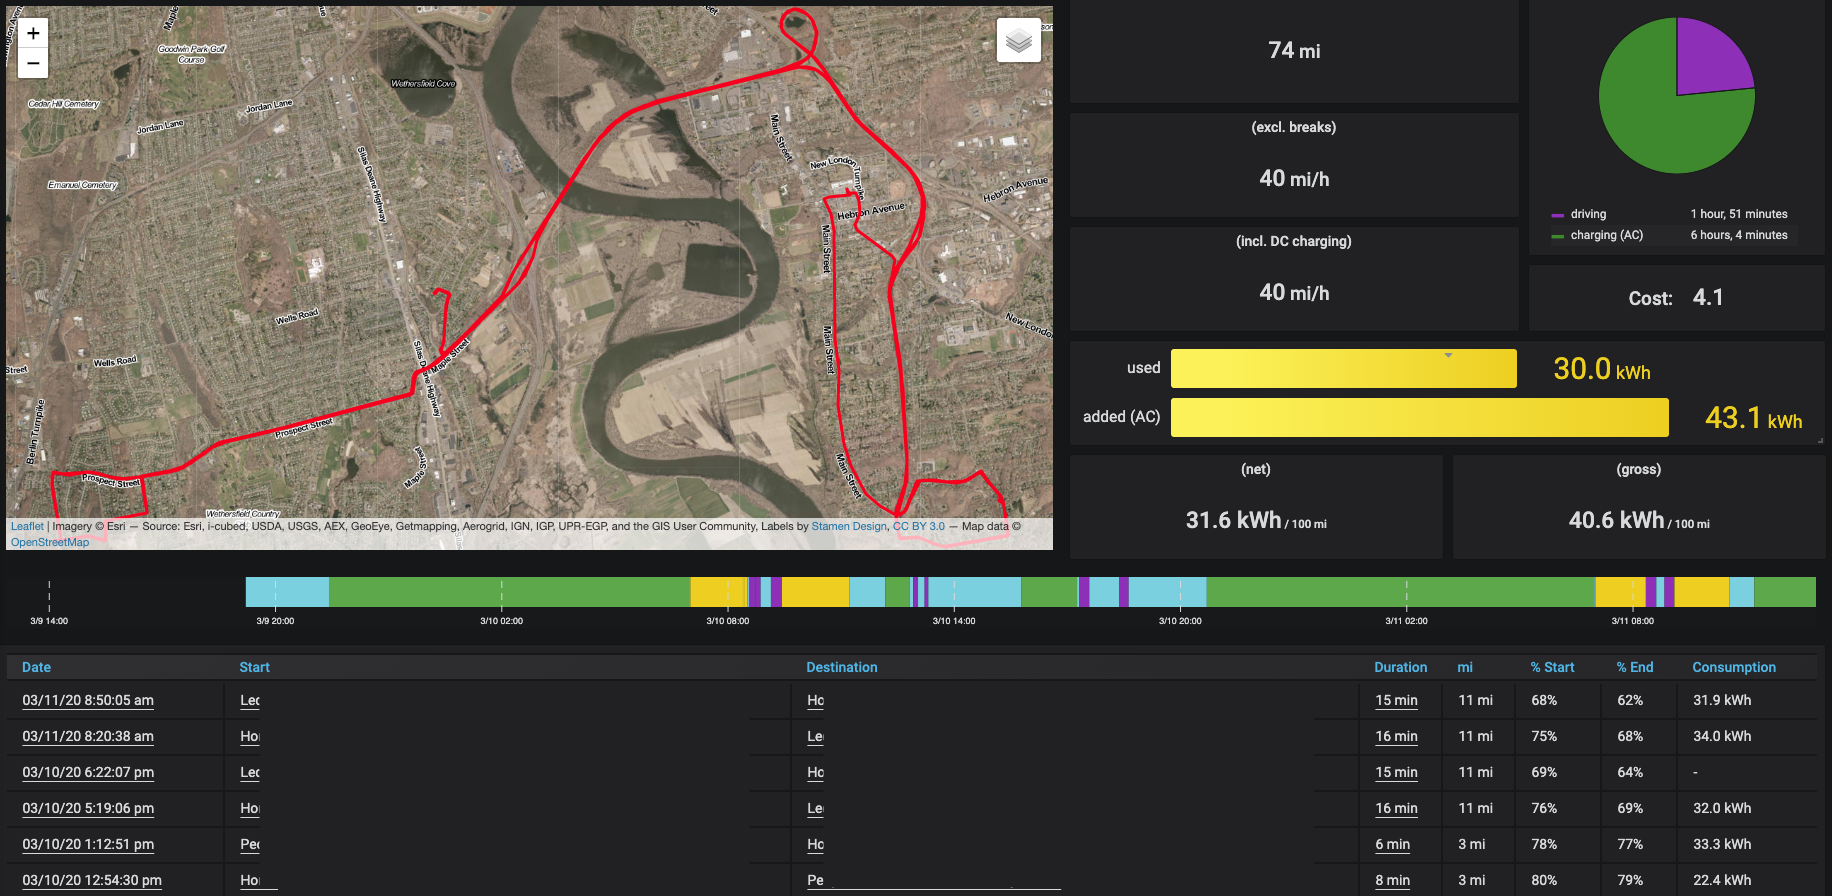
This is probably my favorite dashboard. In this example I’m filtering on the last 48 hours. The map graphically captures all roads traveled. The visuals on the right side pull out time driving vs charging, and how much power was used. Then we see a breakdown of the Tesla’s state (sleeping, driving, charging). Right below that are all of our individual trips.
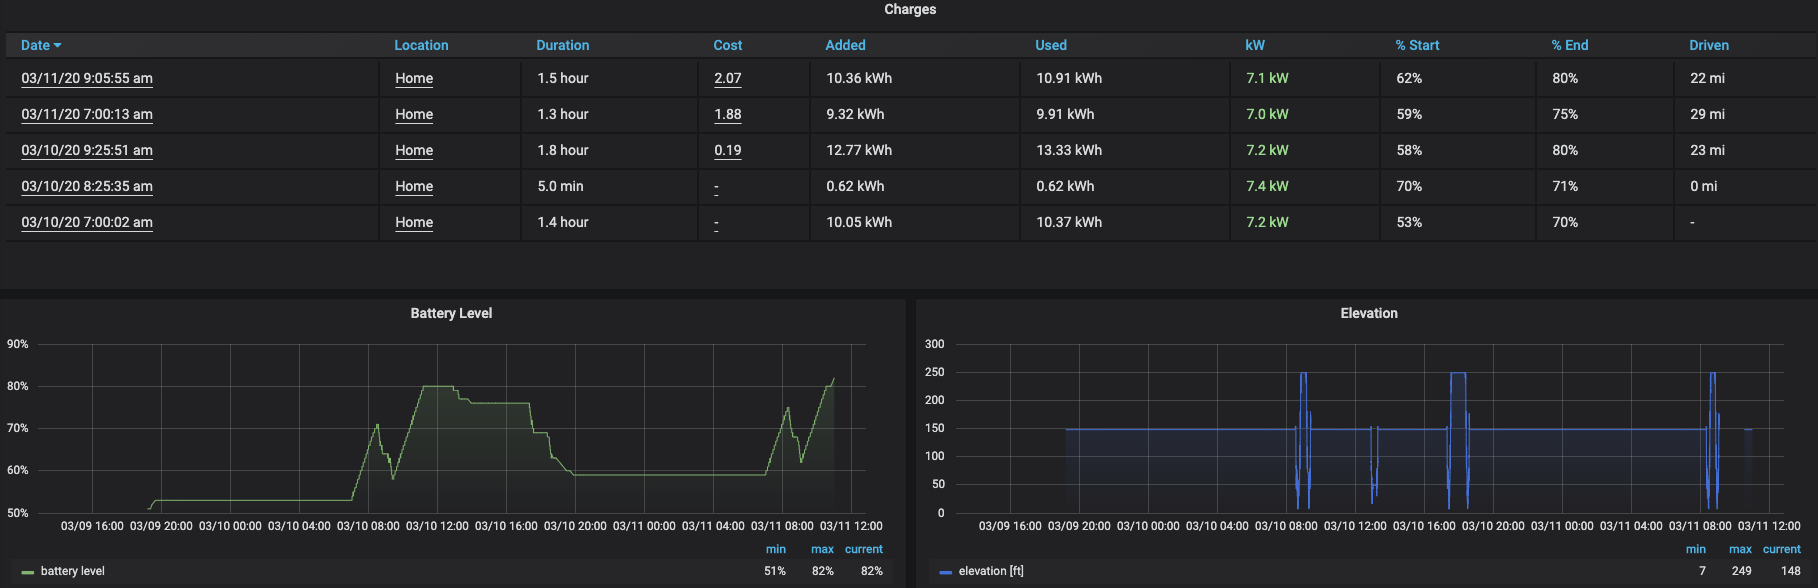
At the bottom of the trips dashboard you’ll see where you’ve charged, how many kWh were added, and even elevation over time!
Updates

Logs updates added to your Tesla
Vampire Drain

Power lost while Tesla has been sitting idle
Visits
A giant map with all of your travel mapped out. This is the same map from the Trips dashboard but blown up to be full screen.